html_css完全入门
基本结构标签
<!DOCTYPE html>
<html>
    <head>
        <meta charset="utf-8">
        <title>我的第一个网页</title>
    </head>
    <body>

        这里是主体: 键盘敲烂, 月薪过万
    </body>
</html>
文本格式化标签
<!DOCTYPE html>
<html>
    <head>
        <meta charset="utf-8">
        <title></title>
    </head>
    <body>
        <h1>网易陷“<em>暴力裁员</em>”舆论危机 股价收跌近2%</h1>
        <h3><del>原标题:网易陷“暴力裁员”舆论危机 股价收跌近2% 来源:</del><b>腾讯证券</b></h3>

        <p><ins>腾讯证券11月26日讯,深陷“<i>暴力裁员</i>”舆论危机的中概股网易周一收盘下跌1.87%,报304.59美元。</ins></p>
        <p>11月23日,一篇标题为《<strong>网易裁员,让保安把身患绝症的我赶出公司。我在网易亲身经历的噩梦!</strong>》的文章出现在网络。<br>文章来自网易的一名前员工发布在微信公众号和新浪微博的同名账号“你的游戏我的心”,内容阐述了自己在与网易公司在进行多个月的交涉过程中,期间受到了各种不公平待遇。该文章一经发出后受到了社会的广泛关注传播,并于24日起持续受到舆论热议,截至11月25日,微博公号的文章阅读量与在看数均已突破10万。</p>

        <!--
         p 段落标签(上下会有空行)
         br 换行
         strong 加粗(推荐)
         b 加粗
         em 倾斜效果(推荐)
         i 倾斜效果
         del 删除线效果(推荐)
         s 删除线效果
         ins 下划线

         -->
    </body>
</html>
div和span标签
<!DOCTYPE html>
<html>
    <head>
        <meta charset="utf-8">
        <title></title>
    </head>
    <body>
        <div> 2333 </div>
        <div> 2333 </div>

        <span> 1234 </span>
        <span> 1234 </span>
        <span> 1234 </span>

        <!--
         div 块标签 独占一行标签
         span 行内标签
         -->
    </body>
</html>
图像标签
<!DOCTYPE html>
<html>
    <head>
        <meta charset="utf-8">
        <title></title>
    </head>
    <body>
        <img src="bomb.png" title="这是一个小飞机的图片">
        <img src="bomb.png" >
        <img src="bomb.png" width="200px">
        <img src="bomb.png" height="100">
        <img src="bomb.png" width="200px" height="100">
        <img src="bomb.png" border="15px">
        <img src="b213.png" alt="小飞机">


        <!--
         img: 是一个单标签也是一个行内标签
            src: 必须属性, 指向了img标签使用的图像地址
            alt: 替换文本, 图像加载不出来的时候会替换图片的位置
            title: 提示文本, 当鼠标放到图片上时会提示用户一些信息
            width: 设定图片的宽度 ->单独设置宽或者高即可,让其自动适配宽高,同时设置容易失真
            height: 设定图片的高度
            border: 设定图片的边框
         -->

    </body>
</html>
超链接标签
<!DOCTYPE html>
<html>
    <head>
        <meta charset="utf-8">
        <title></title>
    </head>
    <body>
        <div><a href="#bottom" id="top">点击跳转最下面嗷</a></div>


        <div><a href="https://www.baidu.com">百度一下你就知道</a></div>

        <div><a href="https://www.baidu.com" target="_self">百度一下你就知道 </a></div>

        <div><a href="https://www.baidu.com" target="_blank">百度一下 新建窗口</a></div>

        <div><a href="https://www.baidu.com"><img src="bomb.png" ></a>图片也可以添加链接</div>

        <div><a href="./03_div和span.html">内部链接</a></div>

        <div><a href="#">空链接</a></div>

        <div><a href="test.zip">下载链接</a></div>

        <br><br><br><br><br><br><br><br><br><br><br><br><br><br><br><br><br><br><br><br><br><br><br><br><br><br><br><br><br><br><br><br><br><br><br><br><br><br><br><br><br><br><br><br><br><br><br><br><br><br><br><br><br><br><br><br><br><br><br><br><br><br><br><br>


        <div id="bottom">底部栏</div>
        <a href="#top">返回顶部</a>

        <!--
         a: 超链接标签(外部链接需要添加 http, 内部链接写地址即可)
            herf: 必须属性,指定目标地址
                #: 空链接
                #name: 锚点链接,跳转到 id为name 标签的地方
            target: 设置新窗口在哪里打开
                self: 默认值, 在本身的窗口打开
                blank: 在新的空白窗口打开


         -->
    </body>
</html>
特殊字符
<!DOCTYPE html>
<html>
    <head>
        <meta charset="utf-8">
        <title></title>
    </head>
    <body>
        <div>
            大于号: >
        </div>
        <div>
            小于号: <
        </div>
        <div>
            空格: 你    好
        </div>
        <div>

        </div>

    </body>
</html>
表格
<!DOCTYPE html>
<html>
    <head>
        <meta charset="utf-8">
        <title></title>
    </head>
    <body>
        <!--            居中   边框像素大小  字体和边框的距离     单元格和单元格的距离  -->
        <table align="center" border="1px" cellpadding="10px" cellspacing="0px" width="500px">
            <tr>
                <th>姓名</th>
                <th>性别</th>
                <th>年龄</th>
            </tr>
            <tr>
                <td>zs</td>
                <td>男</td>
                <td>12</td>
            </tr>
            <tr>
                <td>ls</td>
                <td>男</td>
                <td>14</td>
            </tr>
        </table>
        <!--
        table: 定义表格
            tr: 定义行
                th: 表头,内部文字会加粗,并且居中
                td: 普通单元格
         -->
    </body>
</html>
表格小案例
<!DOCTYPE html>
<html>
    <head>
        <meta charset="utf-8">
        <title></title>
    </head>
    <body>

        <table align="center" width="300" border="1px" cellspacing="0" >
            <tr>
                <th>图书名</td>
                <th>作者</td>
                <th>百科</th>
            </tr>
            <tr>
                <td>西游记</td>
                <td>吴承恩</td>
                <td><a href="https://baike.baidu.com/item/%E8%A5%BF%E6%B8%B8%E8%AE%B0/6786341">百科</a></td>
            </tr>
            <tr>
                <td>红楼梦</td>
                <td>曹雪芹</td>
                <td><a href="https://baike.baidu.com/item/%E7%BA%A2%E6%A5%BC%E6%A2%A6/15311">百科</a></td>
            </tr>
        </table>
    </body>
</html>
表格结构标签
<!DOCTYPE html>
<html>
    <head>
        <meta charset="utf-8">
        <title></title>
    </head>
    <body>

        <table align="center" width="300" border="1px" cellspacing="0">
            <thead>
                <tr>
                    <th>图书名</td>
                    <th>作者</td>
                    <th>百科</th>
                </tr>
            </thead>
            <tbody>
                <tr>
                    <td>西游记</td>
                    <td>吴承恩</td>
                    <td><a href="https://baike.baidu.com/item/%E8%A5%BF%E6%B8%B8%E8%AE%B0/6786341">百科</a></td>
                </tr>
                <tr>
                    <td>红楼梦</td>
                    <td>曹雪芹</td>
                    <td><a href="https://baike.baidu.com/item/%E7%BA%A2%E6%A5%BC%E6%A2%A6/15311">百科</a></td>
                </tr>
            </tbody>
        </table>
        <!--
         thead: 代表表格的头部区域(注意! 内部必须要有 tr 标签)
         tbody: 代表表格的主体区域
         -->
    </body>
</html>
合并单元格
<!DOCTYPE html>
<html>
    <head>
        <meta charset="utf-8">
        <title></title>
    </head>
    <body>
        <table border="1" cellspacing="0" cellpadding="0" width="300px" height="200px" align="center">
        <tr>
            <td></td>
            <td colspan="2" rowspan="2"></td>
            <!-- <td></td>  被跨列合并了 注释或者删除即可-->
        </tr>
        <tr>
            <td rowspan="2"></td>
            <!-- <td></td> -->
            <!-- <td></td> -->
        </tr>
        <tr>
            <!-- <td></td> 被跨行合并了-->
            <td></td>
            <td></td>
        </tr>


        </table>

        <!--
        1. 如果需要跨行则找到需要跨行的最上面第一个单元格,跨列则找到列最左边的第一个单元格
        2. 找到之后,写上 合并的方式=合并的单元格的数量,然后删除多余的单元格即可
        3. 合并的方式:
            colspan: 跨列
            rowspan: 跨行
        -->

    </body>
</html>
列表标签
<!DOCTYPE html>
<html>
    <head>
        <meta charset="utf-8">
        <title></title>
    </head>
    <body>
        <h4>你喜欢吃哪些东西呢:</h4>
        <ul>
            <li><div>榴莲</div></li>
            <li><div>鲱鱼罐头</div></li>
            <li><div>臭豆腐</div></li>
        </ul>

        <h4>你喜欢吃哪些水果呢:</h4>
        <ol start="100">
            <li>香蕉</li>
            <li>苹果</li>
            <li>梨子</li>
        </ol>


        <!--
         ul: 无序列表,默认前方会有一个方块,是没有前后顺序的
         ol: 有序列表,带有序号, 可以通过 start 属性指序号起始序号

         ol 和ul 标签只能嵌套 li 标签,但是! li 标签内可以嵌套其他标签
         li 标签内相当于一个容器,内部可以容纳所有元素
         列表带有自己的样式属性, 我们通过css 去掉即可: list-style
         -->
    </body>
</html>
自定义列表
<!DOCTYPE html>
<html>
    <head>
        <meta charset="utf-8">
        <title></title>
    </head>
    <body>
        <dl>
            <dt>关注我们</dt>
            <dd>新浪微博</dd>
            <dd>官方微信</dd>
            <dd>联系我们</dd>
        </dl>

        <!--
         dl: 自定义列表使用 dl 标签声明, dl 中只能包含 dt 和 dd
         dt: 列表首行,类似凸显这个列表的特点,用来描述这个列表的名字
         dd: 这个列表特点的相关元素
         -->

    </body>
</html>
表单
<!DOCTYPE html>
<html>
    <head>
        <meta charset="utf-8">
        <title></title>
    </head>
    <body>
        <form action="192.168.1.1" method="get" name="name_1">
            用户名<input type="text" name="user_name" value="请输入用户名" maxlength="8" />
            <br>
            密码: <input type="password" name="pwd" value="123" />
            <br>
            性别: <input type="radio" name="sex" value="man" />男 <input type="radio" name="sex" value="woman" checked="checked" />女
            <br>backgr
            爱好: <input type="checkbox" name="hobby" />吃饭 <input type="checkbox" name="hobby" checked="checked" />睡觉 <input type="checkbox"
             name="hobby" />打豆豆
            <br>
            上传头像: <input type="file" name="photo" />
            <br>
            籍贯: <select>
                <option value="sd">山东</option>
                <option value="bj" selected="selected">北京</option>
                <option value="sh">上海</option>
            </select>
            <br>
            个人介绍: <textarea></textarea>


            <br>
            <input type="submit" value="登录" /> <input type="reset" value="重新设置" /> <input type="button" name="" id="" value="点击发送短信" />


        </form>
        <!--
        表单域: 包含了 "表单元素" 的一块区域, 提交之后,会把表单域中的表单元素里的数据提交到 action 元素指定的地方
        input:
            type:
                text: 单行文本输入框,默认输入宽度为 20 个字符
                password: 密码输入框
                radio: 单选按钮,可以实现 多选一, 注意,需要这些按钮有相同的 name 属性
                checkbox: 复选框, name 属性 也需要相同
                submit: 提交按钮,通过 value 来修改 按钮的名字, 点击后会提交数据
                reset: 重置表单域中的值为初始状态

            name: 表单元素的名字, 传到后台的 key
            value: 表单元素值, 将来元素提交到后台的值

            checked: 单选框 和 复选框 可以默认用户打开界面 选中的状态
            maxlength: 规定输入框的最大输入字符长度
        textarea: 双标签 文本域, cols来规定一行能写多少个字rows来控制输入框的行数 一般不在这里控制,通过css控制
        select: 双标签 标签内至少包含一个选项
            option: 选择框内部的选项
                通过 selected 来控制默认选择的选项


         -->
    </body>
</html>
lable标签
<!DOCTYPE html>
<html>
    <head>
        <meta charset="utf-8">
        <title></title>
    </head>
    <body>

        <label>拥有lable标签: <input type="text" /></label>
        <br>
        未拥有: <input type="text"/>

        <br>
        <label for="lab_man">男 </label>  <input type="radio" name="sex" value="man" id="lab_man"/>
        <label >女 <input type="radio" name="sex" value="woman" /></label>

        <!--
         lable: 用于绑定一个表单元素, 当点击 lable 标签内的文本的时候, 浏览器会自动获得对应表单元素的焦点
         有两种写法:
            lable 可以有一个for 属性指向的是一个id,这个id对应着的就是对应的绑定在一起 input 元素的 文本的 id
            简单的写法就是把文本 和 input 都通过 lable 标签包起来
         -->
    </body>
</html>
表单小练习
<!DOCTYPE html>
<html>
    <head>
        <meta charset="utf-8">
        <title></title>
    </head>
    <body>
        <h3>青春不常在,抓紧谈恋爱!</h3>
        <table width="400px" cellspacing="0" border="1">
            <tr>
                <td>
                    性别:
                </td>
                <td>
                    <input type="radio" name="sex" id="lab_man" checked="checked"/><label for="lab_man">男 </label>
                    <input type="radio" name="sex" id="lab_woman" /><label for="lab_woman">女 </label>
                </td>
            </tr>
            <tr>
                <td>
                    生日:
                </td>
                <td>
                    <select>
                        <option value="non" selected="selected">--请选择年--</option>
                        <option value="1997">1997</option>
                        <option value="1996">1996</option>
                        <option value="1995">1995</option>
                    </select>
                    <select>
                        <option value="non" selected="selected">--请选择月--</option>
                        <option value="12">12</option>
                        <option value="11">11</option>
                        <option value="10">10</option>
                    </select>
                </td>
            </tr>
            <tr>
                <td>
                    所在地区
                </td>
                <td>
                    <input type="text" value="上海市陆家嘴" />
                </td>
            </tr>
            <tr>
                <td>
                    学历:
                </td>
                <td>
                    <select>
                        <option value ="cz">初中</option>
                        <option value ="高中" selected="selected">高中</option>
                    </select>
                </td>
            </tr>
            <tr>
                <td>
                    爱好
                </td>
                <td>
                    <input type="checkbox"/>吃饭
                    <input type="checkbox" checked="checked"/>睡觉
                    <input type="checkbox"/>打豆豆
                </td>
            </tr>
            <tr>
                <td>
                    自我介绍
                </td>
                <td>
                    <textarea>
                    </textarea>
                </td>
            </tr>
            <tr>
                <td>
                </td>
                <td>
                    <input type="submit" value="免费注册" />
                </td>
            </tr>
            <tr>
                <td>
                </td>
                <td>
                    <input type="checkbox" id="lable_i"/><label for="lable_i">我同意服务条款</label>
                </td>
            </tr>
            <tr>
                <td>
                </td>
                <td>
                    <a href="#">我是会员,立即加入</a>
                </td>
            </tr>
            <tr>
                <td>
                </td>
                <td>
                    <dl>
                        <dt><h4>我承诺</h4></dt>
                        <dd>和平</dd>
                        <dd>自由</dd>
                        <dd>民主</dd>
                    </dl>
                </td>
            </tr>


        </table>


    </body>
</html>
文字属性
<!DOCTYPE html>
<html>
    <head>
        <meta charset="utf-8">
        <title></title>

        <style type="text/css">
            .ft {
                font-family: "微软雅黑";
                font-size: 20px;
                font-weight: 700;
                /* font-style: italic; */
                /* font-style: normal; */
            }

            . fs {
                font: ;
            }
        </style>
    </head>
    <body>
        <div class="ft">
            爱拼才会赢
        </div>

        <em class="ft">爱拼才会赢</em>


        <!--
         font-size: 设置字体大小
         font_style: 设置字体样式(italic倾斜,normal不倾斜)
         font-weight: 设置字体是否加粗 (400不加粗, 700加粗)
         font-family: 设置字体比如微软雅黑 文泉驿
         font: 复合写法,需要注意有顺序(font-style font-weight font-size font-family),其中字体,和字号是必须要有的
         -->
    </body>
</html>
文本样式
<!DOCTYPE html>
<html>
    <head>
        <meta charset="utf-8">
        <title></title>
        <style type="text/css">
            .tx {
                color: pink;
                text-align: center;
                text-decoration: underline;
            }

            a {
                text-decoration: none;
            }

            p {
                text-indent: 2em;
                /* line-height: 2.5rem; */
                font-size: 20px;
            }
        </style>
    </head>
    <body>
        <div class="tx">爱拼才会赢</div>
        <a href="#">百度一下你就知道</a>
        <p>科技在不断地改变着人们对世界的看法,也无时无刻不在改善着人们的生活。</p>

        <p> 人们通常最直观感受的是其带来关于信息获取、购物渠道、交流沟通、吃饭出行等方式上的变革,但其实科技给一些在平日里被人们“忽视”的产品的赋能,是从细节上提高了我们生活的“享受指数”。</p>
        <!--
        color: 文本颜色
        text-align: 文本对其方式
        text-decoration: 设置文本装饰,下划线,上划线,删除线以及去除装饰
        text-indent: 设置首行缩进(负数也行)
        line-height: 行高,行高由3部分组成,上边距,字体,和下边距,字体大小不能被行间距改变,所以改变行间距只会改变上下边距的大小


        ps: em 是一个相对单位,就是当前元素(font-size)1个文字的大小,如果当前元素没有设置大小,那么会继承父元素的大小

         -->
    </body>
</html>
综合案例练习
<!DOCTYPE html>
<html>
    <head>
        <meta charset="utf-8">
        <title></title>

        <style type="text/css">
            body {
                font-size: 1.25rem;
                font-family: "微软雅黑";
            }

            p {
                text-indent: 2em;
            }

            h1 {
                text-align: center;
                font-weight: 400;
            }

            .img {
                text-align: center;
            }
        </style>
    </head>
    <body>

        <h1>高端玩家难以被复刻的极致灵魂</h1>

        <div style="font-size: 15px; font-weight: 700;text-decoration: underline;">科技在不断地改变着人们对世界的看法,也无时无刻不在改善着人们的生活。</div>
        <input type="text" name="" id="" value="清输入搜索内容" /> <button type="button">搜索</button>
        <hr>
        <p> 人们通常最直观感受的是其带来关于信息获取、购物渠道、交流沟通、吃饭出行等方式上的变革,但其实科技给一些在平日里被人们“忽视”的产品的赋能,是从细节上提高了我们生活的“享受指数”。
        </p>
        <p>
            而小家电恰好是生活“细节”中的关键体现,以小小的吹风机为例,如今消费者对其要求已不仅仅是吹干头发那么简单,而是朝着更科技、更健康的方向去发展。打开任意购物软件,映入眼帘的满是“恒温”“不伤发”“速干”等关键词,这让早几年还只是低价、缺乏科技内涵的吹风机,一下子变得不同起来。
        </p>
        <sp> 这一切的改变,要追溯到 2016 年戴森 Supersonic
            吹风机的推出。当其以快速干发、气流倍增和智能温控不伤发等科技大获成功之后,整个市场也犹如发现新大陆般重新活跃起来。同时跟跑者与模仿者不断涌现,市场上许多其他的吹风机产品为了与科技感挂钩,提出了五花八门的模仿概念——“可以吹脸”“辅助吸收胶原蛋白”,甚至是“平价版戴森”的宣传比比皆是。
        </sp>

        <p class="img">
            <img src="bomb.png">
        </p>

        这些后来者神乎其神的“科技”是真的有技术支持?还是借着东风在收割消费者的智商税?这或许难以定义。但是,我们却可以通过与颠覆吹风机行业变革者——戴森聊聊,看看引领市场潮流,真正充满匠心科技的产品是如何诞生的,是什么吸引大家纷纷跟风。

        DeepTech 近日与戴森个人护理品类高级设计工程师 Veronica Alanis 就吹风机的功能技术、研发经历和企业发展等进行了深入探讨和交流。
    </body>
</html>
伪类选择器
<!DOCTYPE html>
<html>
    <head>
        <meta charset="utf-8">
        <title></title>

        <style type="text/css">
            a:hover{
                color: black;
            }

            a:link{
                color: black;
            }
            a{
                text-decoration: none;
            }
            a:visited{
                color: red;
            }
            a:active{
                color: greenyellow;
            }
            input:focus{
                background-color: #ADFF2F;
            }
        </style>

    </head>
    <body>
        <a href="https://www.baidu.com">百度一下你就知道</a>
        <br>
        <input type="text" name="" id="" value="" />
        <input type="text" name="" id="" value="" />


        <!--
         hover: 鼠标悬浮在上面的状态
         link: 初始的状态
         visited: 按下去之后的状态
         active: 鼠标按下去但是还没弹起时候 a 标签的状态

         focus: 一般用于表单元素,在鼠标点击获得焦点的时候来改变该表单元素的样式
         -->

    </body>
</html>
css元素显示模式 display
<!DOCTYPE html>
<html>
    <head>
        <meta charset="utf-8">
        <title></title>
        <style type="text/css">
            div {
                /* width: 200px; */
                height: 200px;
                background-color: pink;
            }

            span {
                background-color: hotpink;
                width: 100px;
                height: 100px;
            }
            input {
                background-color: pink;
                width: 100px;
                height: 100px;
            };

        </style>
    </head>
    <body>
        <!-- 块元素 -->
        <div>hello</div>world
        <br>
        <!-- 行内元素 -->
        <span>你</span><span>好</span><span>啊</span>
        <span>你</span><span>好</span><span>啊</span>
        <br>
        <!-- 行内块元素 -->
        <input type="text" name="" id="" value="" />
        <input type="text" name="" id="" value="" />

        <!--
         块元素: 独占一行, 宽高内距都可以控制, 宽度默认是父级宽度的100%  div p h
            注意: 文字标签比如 p 和 h 标签内部不应该再放块元素,在渲染时通过检查源代码可以看到标签错乱


        行内元素: 相邻的行内元素占一行,可以一行显示多个,宽高设置是无效的,默认的宽度就是他内容的宽度
            注意: 只能容纳文本或其他行内元素, 但是 a标签里面不能再放a标签了,特殊情况a标签可以转换为块标签

        行内块元素: 如img input td 这些同时具有行内和块的特点,一行可以有多个元素,且可以设置宽高
         -->
    </body>
</html>
css元素模式转换
<!DOCTYPE html>
<html>
    <head>
        <meta charset="utf-8">
        <title></title>
        <style type="text/css">
            a {
                width: 200px;
                height: 200px;
                background-color: pink;
            }
            .ds {
                display: block;
            }

            div {
                width: 100px;
                height: 150px;
                background-color: #ADFF2F;
            }
            .div_ds {
                display: inline;
            }

            span {
                background-color: #FF69B4;
                width: 120px;
                height: 180px;
            }
            .ib {
                display: inline-block;
            }
        </style>

    </head>
    <body>

        <a href="#">百度一下</a>
        <a href="#" class="ds">百度一下</a>

        <div>我是块元素</div>
        <div class="div_ds">我是块元素</div>

        <span>我是span</span>
        <span class="ib">我是span</span>


        <!--
         display: 设置元素显示模式
            inline: 设置行内元素
            block: 设置块元素
            inline-block: 转为行内块元素
         -->
    </body>
</html>
元素转换小案例
<!DOCTYPE html>
<html>
    <head>
        <meta charset="utf-8">
        <title></title>
        <style type="text/css">
            a {
                display: block;
                height: 40px;
                width: 200px;
                background-color: #888;
                text-decoration: none;
                text-indent: 2em;
                line-height: 40px;
            }
            a:hover{
                background-color: #ADFF2F;
            }
            a:active{
                background-color: red;
            }
            }
            a:link{
                background-color: pink;
            }

        </style>
    </head>
    <body>
        <a href="#">手机 平板</a>
        <a href="#">体脂称</a>
        <a href="#">智能家居</a>
        <a href="#">笔记本电脑</a>

        <!--
        小技巧: 如果行高等于盒子的高度,那么这段文本会垂直居中
         -->
    </body>
</html>
背景
<!DOCTYPE html>
<html>
    <head>
        <meta charset="utf-8">
        <title></title>

        <style type="text/css">
            div {
                width: 200px;
                height: 200px;
                background-color: pink;
                background-image: url(bomb.png);
                background-repeat: no-repeat;
                /* background-repeat: repeat-x; */
                /* background-repeat: repeat-y; */

                background-position: center right;
            }
        </style>
    </head>
    <body>

        <div>
        </div>


        <!--
        页面元素既可以添加背景图片,也可以添加背景颜色只不过背景图片权重会高于背景颜色,优先显示
         一般情况下如果不指定背景颜色,那么背景颜色的默认值就是 transparent(透明)

        background-image: 背景图片默认(repeat)会平铺图片
        background-repeat: 设置背景图片是否平铺可以指定 x轴平铺 或者y轴平铺
        background-position: 控制背景图片的方位,如果是方位名词如top left center则不分前后顺序, 如果使用精确定位那么第一个参数一定是 X轴 第二个参数一定是Y轴,如果只给了一个值那么y就是居中

         -->
    </body>
</html>
背景小案例
<!DOCTYPE html>
<html>
    <head>
        <meta charset="utf-8">
        <title></title>
        <style type="text/css">
            h3 {
                font-size: 0.875rem;
                font-weight: 400;
                background-color: pink;
                width: 200px;
                height: 80px;
                line-height: 80px;
                background-image: url(_REOBO0Q862X0$SCI14GK@3.png);
                background-repeat: no-repeat;
                background-position: 5px;
                text-indent: 2em;

            }
        </style>
    </head>
    <body>
        <h3>
            成长守护平台
        </h3>
    </body>
</html>
背景固定
<!DOCTYPE html>
<html>
    <head>
        <meta charset="utf-8">
        <title></title>

        <style type="text/css">
            body {
                color: pink;
                background-image:url(jujia.jpg);
                background-position: center top;
                background-repeat: no-repeat;
                background-attachment: fixed;
            }
            /*
             background-attachment背景图像固定: fixed固定 scrol跟随
             */
        </style>
    </head>
    <body>

        <p>天王盖地虎</p>
        <p>天王盖地虎</p>
        <p>天王盖地虎</p>
        <p>天王盖地虎</p>
        <p>天王盖地虎</p>
        <p>天王盖地虎</p>
        <p>天王盖地虎</p>
        <p>天王盖地虎</p>
        <p>天王盖地虎</p>
        <p>天王盖地虎</p>
        <p>天王盖地虎</p>
        <p>天王盖地虎</p>
        <p>天王盖地虎</p>
        <p>天王盖地虎</p>
        <p>天王盖地虎</p>
        <p>天王盖地虎</p>
        <p>天王盖地虎</p>
        <p>天王盖地虎</p>
        <p>天王盖地虎</p>
        <p>天王盖地虎</p>
        <p>天王盖地虎</p>
        <p>天王盖地虎</p>
        <p>天王盖地虎</p>
        <p>天王盖地虎</p>
        <p>天王盖地虎</p>
        <p>天王盖地虎</p>
        <p>天王盖地虎</p>
        <p>天王盖地虎</p>
        <p>天王盖地虎</p>
        <p>天王盖地虎</p>
        <p>天王盖地虎</p>
        <p>天王盖地虎</p>
        <p>天王盖地虎</p>
        <p>天王盖地虎</p>
        <p>天王盖地虎</p>
        <p>天王盖地虎</p>
        <p>天王盖地虎</p>
        <p>天王盖地虎</p>
        <p>天王盖地虎</p>
        <p>天王盖地虎</p>
        <p>天王盖地虎</p>
        <p>天王盖地虎</p>
        <p>天王盖地虎</p>
        <p>天王盖地虎</p>
        <p>天王盖地虎</p>
        <p>天王盖地虎</p>
        <p>天王盖地虎</p>
        <p>天王盖地虎</p>
        <p>天王盖地虎</p>
    </body>
</html>
背景色复合写法_半透明rgba
<!DOCTYPE html>
<html>
    <head>
        <meta charset="utf-8">
        <title></title>
        <style type="text/css">
            body {
                background: pink url(jujia.jpg) no-repeat fixed center;
            }
            div {
                width: 300px;
                height: 300px;
                /* background: pink; */
                background: rgba(0,0,0,0.3);
            }
        </style>
    </head>
    <body>

        <div>
            background可以复写
            可以通过 rgba来设置背景半透明样式, 其中前三个为rgb颜色值, 第四个为透明度, 0完全透明, 1实体
            rgba 不会影响到盒子内的样式
        </div>
    </body>
</html>
背景综合案例
<!DOCTYPE html>
<html>
    <head>
        <meta charset="utf-8">
        <title></title>
        <style type="text/css">
            .nave a {
                display: inline-block;
                width: 100px;
                height: 50px;
                text-align: center;
                line-height: 50px;
                color: indianred;
                text-decoration: none;
            }
            .bg1:hover {
                background: #888888;
                color: #fff;
            }
            .bg2:hover {
                background: greenyellow;
                color: #fff;
            }
            .bg3:hover {
                background: gold;
                color: #fff;
            }
            .bg4:hover {
                background: red;
            }
        </style>
    </head>
    <body>
        <div class="nave">
            <a href="#" class="bg1">五彩导航</a>
            <a href="#" class="bg2">五彩导航</a>
            <a href="#" class="bg3">五彩导航</a>
            <a href="#" class="bg4">五彩导航</a>
        </div>
    </body>
</html>
css继承
<!DOCTYPE html>
<html>
    <head>
        <meta charset="utf-8">
        <title></title>
        <style type="text/css">
            body {
                color: pink;
                font: 12px/1.5 '微软雅黑';
            }

            div {
                font-size: 20px;
            }
            p {
                font-size: 24px;
                line-height: 30px;
            }
        </style>
    </head>
    <body>

        <div>这是一个div,继承了父标签的一些样式,由于继承了父元素的行高,1.5代表了当前元素文字大小的1.5倍的意思</div>
        <span>本身没有任何样式,全部继承自父元素</span>
        <p>这是span 自己指定了字体大小和行高,优先使用自己的</p>


    </body>
</html>
css优先级
<!DOCTYPE html>
<html>
    <head>
        <meta charset="utf-8">
        <title></title>

        <style type="text/css">
            .myst {
                color: pink;
            }
            div {
                color: red!important;
            }

        </style>
    </head>
    <body>
        <div class="myst" style="color: #000000;">
            hello
        </div>


        <!--
         选择器相同, 则按照层叠性执行
         选择器不同的,则根据选择器权重执行,选择器权重从小到大排序: 继承或者* 元素选择器 类和伪类选择器 id选择器 行内式 !important
         -->
    </body>
</html>
css层叠性
<!DOCTYPE html>
<html>
    <head>
        <meta charset="utf-8">
        <title></title>
        <style type="text/css">
            div {
                color: pink;
            }
            div {
                color: red;
            }
        </style>
    </head>
    <body>

        <div>按照就近原则,在样式表中从下往上寻找样式,执行第一个样式</div>
    </body>
</html>
css选择器权重
<!DOCTYPE html>
<html>
    <head>
        <meta charset="utf-8">
        <title></title>
        <style type="text/css">
            ul li {
                color: greenyellow;
            }
            li {
                color: red;
            }
            .nav li {
                color: pink;
            }
        </style>
    </head>
    <body>

        <ul class="nav">
            <li>1</li>
            <li>2</li>
            <li>3</li>
        </ul>

        <!--
         复合选择器会有权重的叠加,优先使用权重高的, ul li 的权重是 0 0 0 1 + 0 0 0 1 =0 0 0 2  而li的权重仅仅是0001
         nav li 的权重是 0010 + 0001 = 0011,权重最大
         注意! 权重虽然可以叠加,但是不会有进位的问题10个li选择器也仅仅是0 0 0 10
         -->
    </body>
</html>
盒子模型
<!DOCTYPE html>
<html>
    <head>
        <meta charset="utf-8">
        <title></title>

        <style type="text/css">
            div {
/*              border-style: dotted;
                border-color: pink;
                border-width: 10px; */
                border-right: 5px solid pink;
                border-top: 15px dashed red;
                width: 200px;
                height: 200px;
            }
        </style>
    </head>
    <body>

        <div>

        </div>


        <!--
        border可以复写并且没有顺序限制,且可以单独为每一边单独设置边框
        border-style: 边框样式 solid实线 dashed虚线 dotted点线
        border-color: 边框颜色
        border-width: 边框宽度

        border边框会改变盒子的大小,不会改变内部容器的大小就像,你给一个东西包了一层包装和包了10层包装的样子
        所以测量盒子大小的时候,是不量边框的容易有误差

         -->

    </body>
</html>
表格细线边框处理
<!DOCTYPE html>
<html>
    <head>
        <meta charset="utf-8">
        <title></title>
        <style type="text/css">
            table {
                width: 300px;
                height: 210px;
                text-align: center;
                border-collapse: collapse;
                font-size: 15px;
            }

            table,
            td {
                border: pink 1px solid;
            }
        </style>
    </head>
    <body>
        <!--
        border-collapse 可以改变相邻的边框是否合并
        注意边框会影响盒子的大小
         -->

        <table cellspacing="0">
            <th>
            <td>姓名</td>
            <td>年龄</td>
            </th>
            <tr>
                <td></td>
                <td>zs</td>
                <td>18</td>
            </tr>
            <tr>
                <td></td>
                <td>ls</td>
                <td>16</td>
            </tr>
        </table>
    </body>
</html>
盒子模型padding
<!DOCTYPE html>
<html>
    <head>
        <meta charset="utf-8">
        <title></title>
        <style type="text/css">
            div {
                width: 200px;
                height: 200px;
                background: pink;
                /* padding-left: 20px; */
                /* padding: 10px;  上下左右都是10px */
                /* padding: 5px 10px; 代表上下5px 左右10px */
                padding: 5px 10px 20px 30px;
                顺时针,
                分别是上右下左的顺序
                /* margin-left: 120px; */
            }
        </style>
    </head>
    <body>
        <span style="width: 300px;height: 300px;background: red ;display: inline-block;">
            <div>
                你好啊
            </div>
        </span>


        <!--
         padding: 内边距 代表了内边框与盒子中实体内容content的距离, 通过调整padding 控制盒子中实体内容的位置

         padding 如果设置了宽高,那么设置padding也会影响盒子的大小,就像内部东西把盒子撑大了一样,如果不设置宽高,那么盒子会自适应内部的大小


         -->
    </body>
</html>
padding练习导航栏
<!DOCTYPE html>
<html>
    <head>
        <meta charset="utf-8">
        <title></title>
        <style type="text/css">
            .nav {
                height: 41px;
                border-top: 3px solid pink;
                border-bottom: 1px solid red;
                background-color: #fcfcfc;
                line-height: 41px;
            }
            .nav a {
                color: red;
                text-decoration: none;
                padding: 0 10px;
                display: inline-block;
                height: 40px;
            }
            .nav a:hover {
                background: gold;
            }
        </style>
    </head>
    <body>

        <div class="nav">
            <a href="#">新浪</a>
            <a href="#">腾讯新闻</a>
            <a href="#">偷菜吧</a>

        </div>
    </body>
</html>
margin盒子模型
<!DOCTYPE html>
<html>
    <head>
        <meta charset="utf-8">
        <title></title>
        <style type="text/css">
            div {
                background: pink;
                width: 200px;
                height: 200px;
            }
            .one {
                margin-bottom: 10px;
            }
            .two {
                margin:100px auto;
            }
        </style>
    </head>
    <body>
        <div class="one">1</div>
        <div class="two">2</div>

        <!--
         margin 也可以简写,简写方式和 padding复写方式一样的规则
         注意可以通过margin 设置水平居中只需要设置margin为 auto 自动即可(需要给当前元素设置宽度 才能使用<auto></auto>)
         行内元素尽量避免设置上下margin设置了也没用, 可以设置左右margin
         -->
    </body>
</html>
margin外边距合并
<!DOCTYPE html>
<html>
    <head>
        <meta charset="utf-8">
        <title></title>
        <style type="text/css">
            .damao, .ermao {
                width: 200px;
                height: 200px;
                background: pink;
            }
            .damao {
                margin-bottom: 50px;
            }
            .ermao {
                margin-top: 100px;
            }
        </style>
    </head>
    <body>

        <div class="damao">
            大毛
        </div>
        <div class="ermao">
            二毛
        </div>

        <!--
         当上下两个盒子都有外边距的时候,那么两个盒子实际的margin距离以两个盒子中最大margin的那个为准,而不是相加
         尽量避免,所以干脆直接给一个盒子设置margin就行了,反正有一个不会生效
         -->
    </body>
</html>
margin外边距塌陷_01
<!DOCTYPE html>
<html>
    <head>
        <meta charset="utf-8">
        <title></title>
        <style type="text/css">
            .wai {
                width: 400px;
                height: 400px;
                background: #CD5C5C;
                margin-top: 50px;
                /* border-top: 1px solid transparent; */
                /* padding: 1px; */
                overflow: hidden;
            }
            .nei {
                width: 200px;
                height: 200px;
                background: pink;
                margin-top: 100px;
            }
        </style>
    </head>
    <body>
        <div class="wai">
            <div class="nei">

            </div>

        </div>

        <!--
        注意! 塌陷只发生在块元素且只涉及到块元素设置margin-top/bottom, 行内块元素是不会发生塌陷的

         如果两个嵌套的盒子,比如父子盒子, 如果子盒子比父盒子的margin大,那么会造成父盒子的位移塌陷,
         解决办法 1. 就是给父盒子添加一个上边框,如上,可以注释第12行透明边框来查看差别
         解决办法 2. 可以给父盒子添加一个 1px的内边距
         解决办法 3. 给父盒子添加一个样式 overflow: hidden 做溢出处理即可(BFC原理)
         -->
    </body>
</html>
margin外边距塌陷_02
<!DOCTYPE html>
<html>
    <head>
        <meta charset="utf-8">
        <title></title>
        <style type="text/css">
            * {
                margin: 0;
                padding: 0;
                font-size: 0;
            }
            div {
                /* display: inline-block;  /* 注释这一句观看style差别 */ */
            }
            .main {
                width: 200px;height: 200px;
                background: pink;
            }
            .sub {
                margin-top: 20px;
                width: 100px;height: 100px;
                background: #87CEEB;
            }
        </style>
        <!--

         行内块元素是不会发生塌陷的, 可以通过第 13行 控制div标签的属性,来观察差别
         -->
    </head>
    <body>


        <div class="main">
            <div class="sub">
            </div>
        </div>
    </body>
</html>
盒子模型练习_01
colo<!DOCTYPE html>
<html>
    <head>
        <meta charset="utf-8">
        <title></title>
        <style type="text/css">
            * {
                margin: 0px;
                padding: 0px;
            }

            body {
                background: #f5f5f5;
            }


            .box {
                width: 285px;
                height: 420px;
                background: #fff;
                margin: 0 auto;
                margin-top: 20px;

            }

            .box img {
                width: 100%;
            }

            .comm {
                font-size: 14px;
                height: 50px;
                padding: 0px 20px;
                /*  因为这个段落没有 weight 属性 所以这个padding不会撑开盒子 */
                margin-top: 30px;
                /* padding-top: 30px; */
                text-indent: 2em;
            }

            .dt {
                text-align: right;
                padding-right: 20px;
                /* margin-right: 20px; */
                color: #888;
                font-size: 10px;
                margin-top: 20px;
            }

            .info {
                margin-top: 40px;
                /* margin-right: 20px; */
                padding-left: 110px;
            }
        </style>
    </head>
    <body>
        <div class="box">
            <img src="%25(8XT5_EL_4K65L2KAF@O42.png">
            <p class="comm">
                快递很快,耳机带着很舒服,还会下次光临...
            </p>
            <p class="dt">
                来自2019-11-11
            </p>
            <div style="font-size: 14px;" class="info">
                <h4 style="display: inline-block;font-weight: 400;">bose无线蓝牙耳...</h4><span style="font-size: 20px;color: #888888;">|</span> <span
                 style="color: red;">99 元</span>
            </div>
        </div>
    </body>
</html>
盒子模型练习_02
<!DOCTYPE html>
<html>
    <head>
        <meta charset="utf-8">
        <title></title>
        <style type="text/css">
            * {
                margin: 0rem;
                padding: 0px;
            }
            div {
                width: 300px;
                height: 400px;
                background: #F5F5F5;
                margin: 100px auto;
                border: #888888 solid 1px;
            }
            a:hover {
                color: red;
                text-decoration: underline;
            }
            li {
                list-style: none;
                height: 30px;
                line-height: 30px;
                padding-left: 30px;
            }
            ul {
                padding-top: 20px;
            }
            a {
                font-size: 14px;
                text-decoration: none;
                color: #666;
            }
            div h3 {
                weight: 300px;
                height: 36px;
                border-bottom: #888888 dotted 1px;
                line-height: 36px;
                padding-left: 20px;
                font-weight: 400;

            }
        </style>
    </head>
    <body>

        <div>
            <h3>今日快报</h3>
            <ul>
                <li><a href="">第一个快报</a></li>
                <li><a href="">第二个</a></li>
                <li><a href="">第三个</a></li>
                <li><a href="">第四个</a></li>
                <li><a href="">第五个快报</a></li>
            </ul>
        </div>
    </body>
</html>
圆角边框
<!DOCTYPE html>
<html>
    <head>
        <meta charset="utf-8">
        <title></title>
        <style type="text/css">
            div {
                width: 200px;
                height: 300px;
                background-color: pink;
                margin: 100px auto;
                /* border-radius: 20px; */
                /* border-radius: 50%; */
                /* border-radius: 10px 20px 30px 40px; */
                border-top-right-radius: 1.25rem;
                border-top-left-radius: 2.5rem;
                border-bottom-left-radius: 3.75rem;
                border-bottom-right-radius: 100px;
            }
        </style>
    </head>
    <body>
        <div>

        </div>


        <!--
         border-radius: 实现原理是,画一个半径为 leight 的圆, 依次对比上右下左的角
         -->
    </body>
</html>
盒子阴影
<!DOCTYPE html>
<html>
    <head>
        <meta charset="utf-8">
        <title></title>

        <style>
            div {
                width: 200px;
                height: 200px;
                background-color: pink;

            }
            div:hover {
                box-shadow: 0 0 10px 1px rgba(0,0,0,0.3);
            }
        </style>
    </head>
    <body>

        <div>
            hello world
        </div>
        <!--
        box-shadow: 阴影是不占用空间的, 接收多个参数 上面的参数顺序依次为
            1. h-shadow: 水平方向阴影的位置可以为负数
            2. v-shadow: 垂直方向的位置可以为负数
            3. blur: 模糊距离
            4. spread: 影子的大小
            5. color: 影子的颜色,一般我们用半透明的样式 rgba
            6. inset: 将外部阴影改为内部阴影
         -->

    </body>
</html>
浮动
<!DOCTYPE html>
<html>
    <head>
        <meta charset="utf-8">
        <title></title>
        <style type="text/css">
            div {
                width: 50px;
                height: 300px;
                background: pink;
            }
            .left {
                width: 200px;
                height: 200px;
                float: left;
            }
            .right {
                width: 100px;
                height: 200px;
                float: right;
            }

            span {
                width: 300px;
                height: 300px;
                background: red;
                float: left;
            }

            a {
                width: 100px;
                height:200px;
                background: greenyellow;
                float: right;
            }

        </style>
    </head>
    <body>
        <div class="left">left</div>
        <div class="left">left</div>
        <div class="right">right</div>
        <div>hello</div>
        <div>232323</div>


        <span>这是一个span标签,添加了浮动之后可以设置宽高了</span>
        <a href="">如果行内元素设置了浮动,那么不需要改变显示模式为行内块元素,设置成浮动之后可以直接给宽度和高度</a>


        <!--
        注意! 浮动的子盒子在父盒子中是不占用位置的
        1. float 属性用于创建浮动框,将其移动到一边,直到左边缘或右边缘触及包含块或另一个浮动框的边缘,如果父级的盒子装不下浮动上来的多个盒子,那么浮动的盒子会另起一行显示
        2. 浮动元素会脱离标准流: 浮动的盒子不再保留的原来的位置
        3. 浮动的元素会在一行内显示并且元素顶部对齐
        4. 浮动的元素具有行内块元素的特性
        5. 浮动元素的位置会被父元素约束
        6. 浮动的盒子只会压住标准流的盒子,但是不会压住下面标准流盒子中的文字,因为浮动最初的设计初衷就是做文字环绕效果的

         -->
    </body>
</html>
浮动练习1
<!DOCTYPE html>
<html>
    <head>
        <meta charset="utf-8">
        <title></title>
        <style type="text/css">
            .main {
                width: 500px;
                height: 220px;
                background: pink;
                margin: 10px auto;
            }
            .right {
                width: 400px;
                height: 100%;
                background: gray;
                float: left;
            }
            .left {
                width: 100px;
                background: red;
                height: 100%;
                float: left;
            }
        </style>
    </head>
    <body>

        <div class="main">
            <div class="left"><ul>
                <li></li>
                <li></li>
                <li></li>
                <li></li>
                <li></li>
            </ul></div>
            <div class="right">right</div>
        </div>
    </body>
</html>
浮动练习2
<!DOCTYPE html>
<html>
    <head>
        <meta charset="utf-8">
        <title></title>

        <style type="text/css">

            * {
                padding: 0rem;
                margin: 0rem;
            }
            ul {
                list-style: none;
                width: 500px;
                height: 100px;
                background: pink;
                margin: 100px auto;

            }
            li {
                float: left;
                width: 100px;
                height: 100%;
                background: red;
                margin-right: 33px;
            }
            .last {
                margin: 0px;
            }
        </style>
    </head>
    <body>
        <ul class="box">
            <li>1</li>
            <li>2</li>
            <li>3</li>
            <li class="last">4</li>
        </ul>
    </body>
</html>
浮动练习3
<!DOCTYPE html>
<html>
    <head>
        <meta charset="utf-8">
        <title></title>

        <style type="text/css">
            * {margin: 0;padding: 0;}
            .box {
                width: 600px;
                height: 240px;
                background: pink;
                margin: 0 auto;
            }
            .one {
                width: 200px;
                height: 100%;
                background: #666666;
                float: left;
            }
            .two {
                width: 400px;
                height: 100%;
                background: #888;
                float: left;
            }
            ul {
                list-style: none;
            }

            li {
                height: 30px;
                float: left;
                height: 115px;
                width: 120px;
                background: pink;
                margin-right: 20px;
                margin-bottom: 10px;
            }

            .right {
                margin-right: 0;
            }
        </style>
    </head>
    <body>


        <div class="box">
            <div class="one">left</div>
            <div class="two"><ul>
                <li>1</li>
                <li>2</li>
                <li class="right">3</li>
                <li>4</li>
                <li>5</li>
                <li class="right">6</li>
            </ul></div>

        </div>
    </body>
</html>
网页布局经典练习
<!DOCTYPE html>
<html>
    <head>
        <meta charset="utf-8">
        <title></title>
        <style type="text/css">
            *{margin: 0;padding: 0;}
            .top {
                height: 3.125rem;
                background-color: gray;
            }

            .main {
                height: 200px;
                width: 80%;
                background: gray;
                margin: 5px auto;
            }
            .info {
                height: 18.75rem;
                background: gray;
                width: 80%;
                margin: 5px auto;
            }
            ul {
                list-style: none;
                height: 100%;
            }
            li {
                height: 100%;
                width: 25%;
                float: left;
            }


        </style>
    </head>
    <body>
        <div class="top">top</div>
        <div class="main">main</div>
        <div class="info"><ul>
            <li>1</li>
            <li>2</li>
            <li>3</li>
            <li>4</li>
        </ul></div>
        <div class="last">lash </div>
    </body>
</html>
清除浮动1
<!DOCTYPE html>
<html>
    <head>
        <meta charset="utf-8">
        <title></title>
<style>
    * {margin: 0;padding: 0;}
    .clearfax:after,
    .clearfax:before{
        content: "";
        display: table;
        height: 0;
        clear: both;
        visibility: hidden;
    }
    .clearfax {
        *zoom: 1;
    }


/*  .clearfax:after {
        content: "";
        display: block;
        height: 0;
        clear: both;
        visibility: hidden;
    }
    .clearfax {
        *zoom: 1;
    } */

    .box {
        width: 600px;
        background: pink;
        border: black 2px solid;
        margin: 0 auto;
        /* overflow: auto; */
    }

    .one {
        width: 200px;;
        height: 190px;
        background: #666666;
        float: left;

    }
    .two {
        width: 300px;
        height: 220px;
        background: #808080;
        float: left;
    }

    .clear {
        clear: both;
    }
</style>
    </head>
    <body>
        <div class="box clearfax">
            <div class="one">1</div>
            <div class="two">2</div>
            <!-- <div class="clear"> -->

            </div>
        </div>

        <div style="width: 650px;height: 200px; background: red;"> 其他文档流</div>


        <!--
        父元素很多时候需要动态的根据子元素的数量来动态的获取高度
        父元素如果不设置高度,那么子元素的高度会自动填充撑起父元素,
        如果子元素设置了浮动,那么子元素就脱离了文档流,不占用文档流的位置了,这时候父元素就没有子元素来撑高度了
        清除浮动的原理 就是闭合浮动
        闭合浮动: 限制浮动的子元素让其只在父元素内活动

        四种方法:
            1. 额外标签法 在最后一个浮动的子元素的后面添加一个标签,标签的样式需要有clear:both属性且必须是块元素
            2. overflow: 给父级元素 添加 overflow 属性即可,代码简洁但是无法显示溢出的部分 (BFC原理)
            3. after: 伪元素法,是标签法的升级版没有增加额外标签,界面更简洁
            4. befor after 双伪元素清除浮动

        -->
    </body>
</html>
清除浮动2 flow-root
<!DOCTYPE html>
<html>
    <head>
        <meta charset="utf-8">
        <title></title>
        <style type="text/css">
            .box1 {
                width: 200px;
                border: solid 5px #00A4FF;
                display: flow-root;
            }
            .box2 {
                height: 190px;
                width: 100px;
                background: pink;
                float: left;
            }
        </style>
    </head>
    <body>
        <div class="box1">
            <div class="box2">

            </div>
        </div>
        <h3>使用 display: flow-root 新样式产生BFC来清除浮动</h3>
    </body>
</html>
浮动案例demo
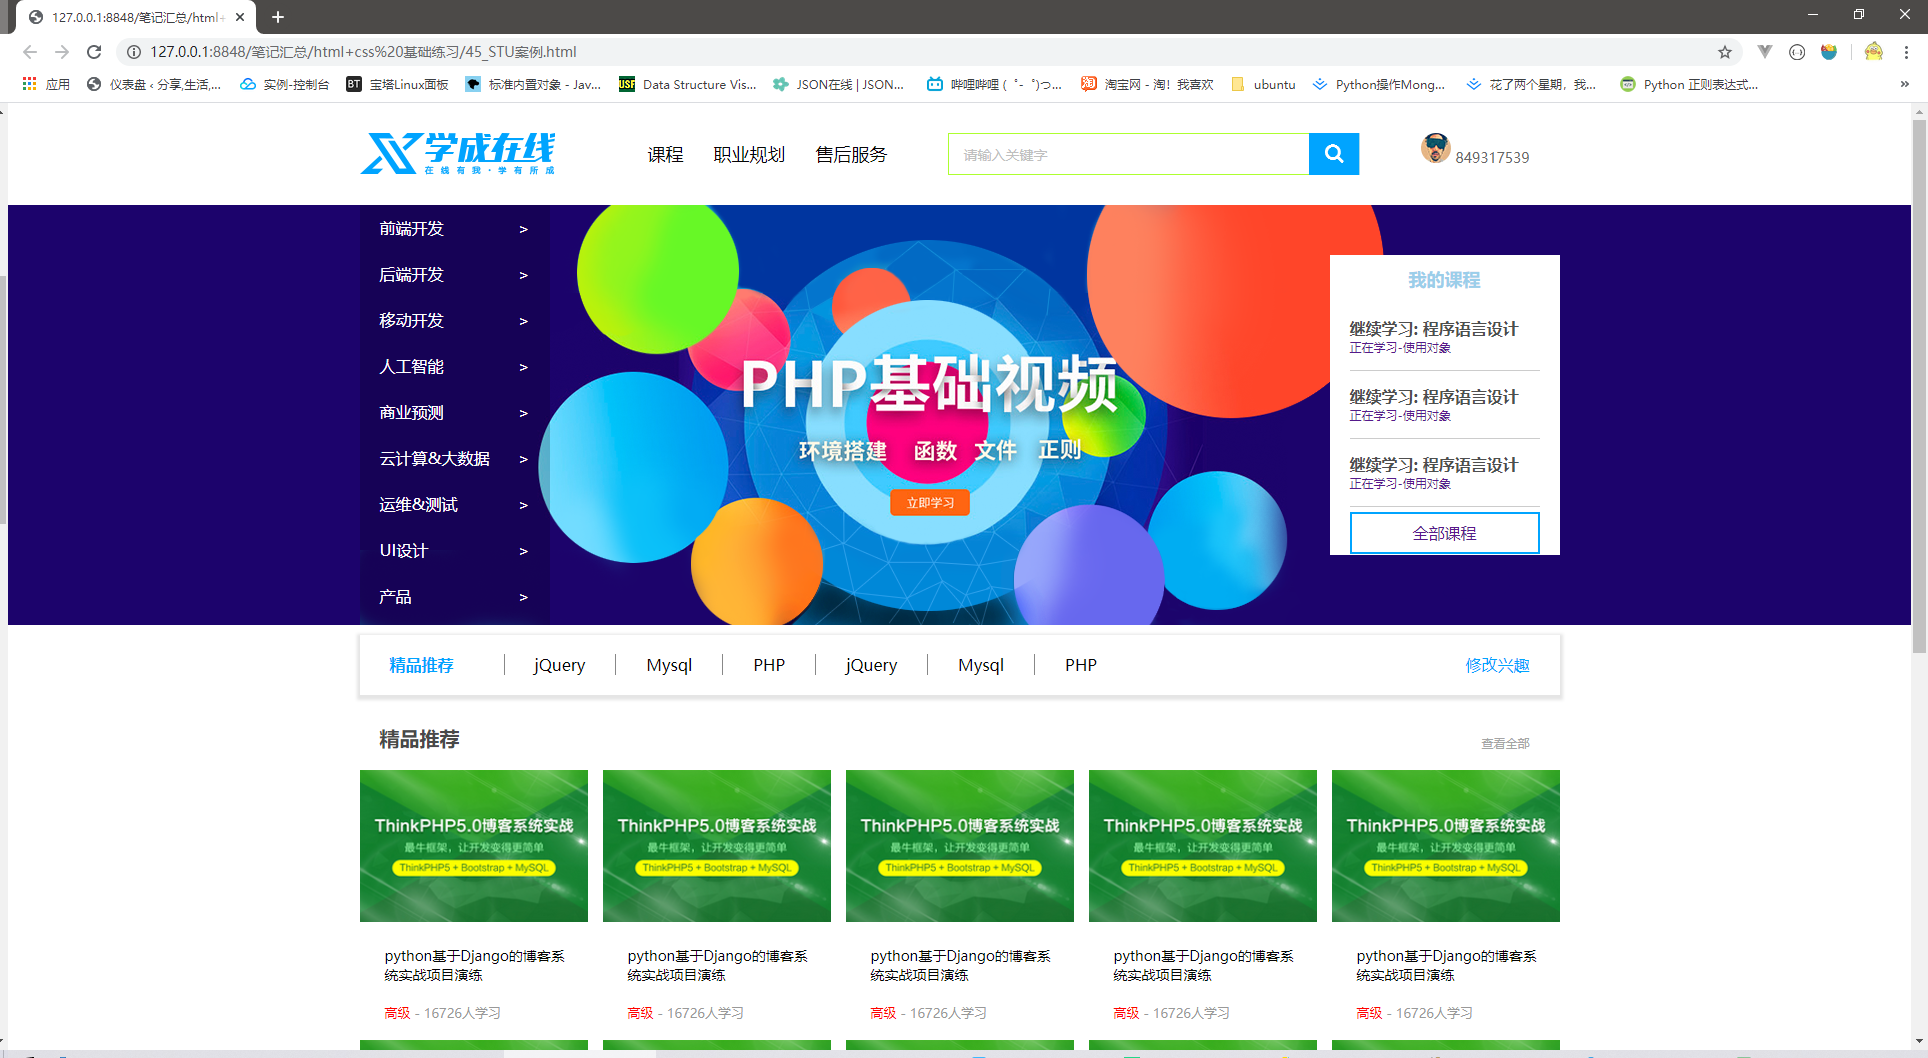
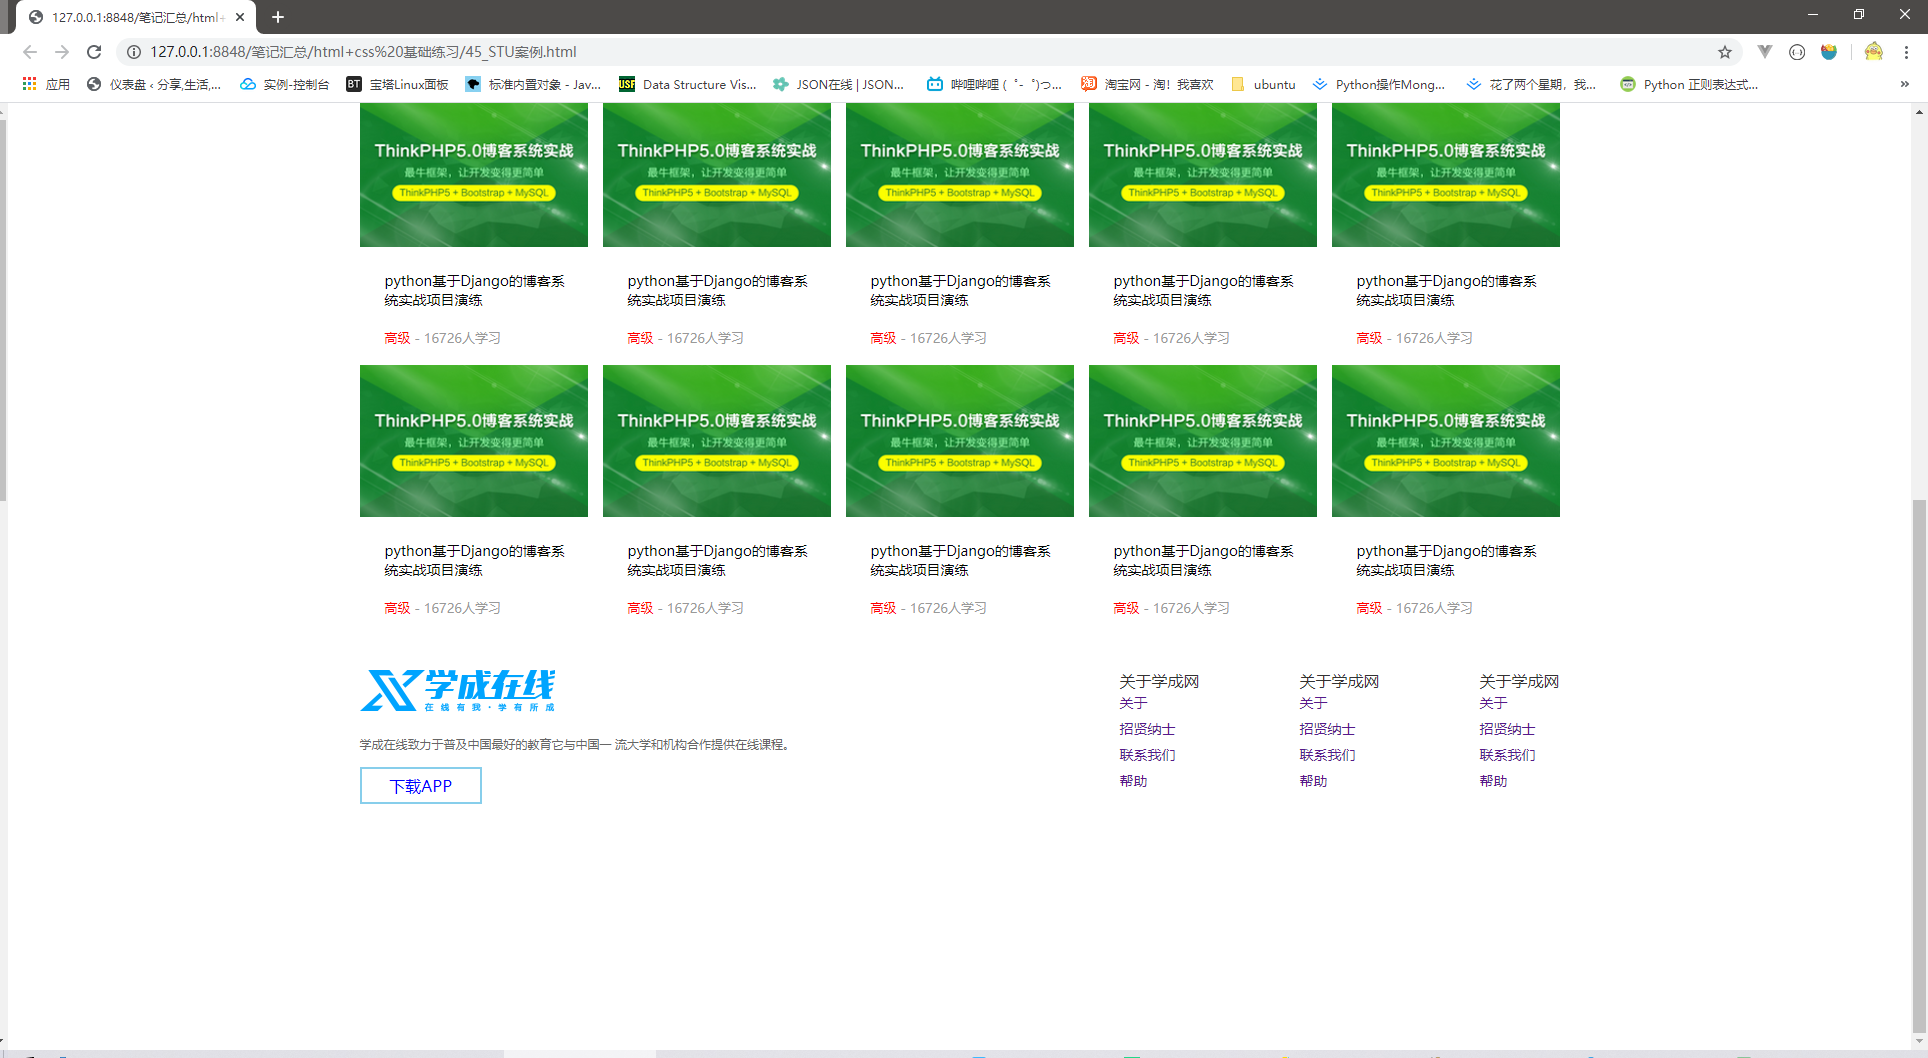
<!DOCTYPE html>
<html>
    <head>
        <meta charset="utf-8">
        <title></title>
        <link rel="stylesheet" type="text/css" href="stu.css" />

        <style type="text/css">


        </style>
    </head>
    <body>
        <!-- 头部 -->
        <div class="header main">
            <!-- logo -->
            <div class="log">
                <img src="stu_imgs/logo.png">
            </div>

            <!-- 导航栏 -->
            <div class="nav">
                <ul>
                    <li><a href="">课程</a></li>
                    <li><a href="">职业规划</a></li>
                    <li><a href="">售后服务</a></li>
                </ul>
            </div>

            <!-- 搜索框 -->
            <div class="search">
                <input type="text" value="请输入关键字" />
                <button type="button"></button>
            </div>

            <!-- 个人头像 -->
            <div class="user">
                <img src="stu_imgs/user.png">
                849317539
            </div>
        </div>

        <!-- bander -->
        <div style="background: #1c036c; height: 420px;">

            <div class="bander main">

                <div class="subnav">
                    <ul>
                        <li><a href="">前端开发<span>></span></a></li>
                        <li><a href="">后端开发<span>></span></a></li>
                        <li><a href="">移动开发<span>></span></a></li>
                        <li><a href="">人工智能<span>></span></a></li>
                        <li><a href="">商业预测<span>></span></a></li>
                        <li><a href="">云计算&大数据<span>></span></a></li>
                        <li><a href="">运维&测试<span>></span></a></li>
                        <li><a href="">UI设计<span>></span></a></li>
                        <li><a href="">产品<span>></span></a></li>
                    </ul>
                </div>
                <div class="stutab">
                    <h2>我的课程</h2>
                    <div class="bd">
                        <ul>
                            <li><a href="">
                                    <h4>继续学习: 程序语言设计</h4>
                                    <p>正在学习-使用对象</p>
                                </a></li>
                            <li><a href="">
                                    <h4>继续学习: 程序语言设计</h4>
                                    <p>正在学习-使用对象</p>
                                </a></li>
                            <li><a href="">
                                    <h4>继续学习: 程序语言设计</h4>
                                    <p>正在学习-使用对象</p>
                                </a></li>

                        </ul>
                        <a href="" class="count">全部课程</a>
                    </div>
                </div>
            </div>
        </div>

        <!-- 精品推荐 -->
        <div class="goods main">
            <h3>精品推荐</h3>
            <ul>
                <li><a href="">jQuery</a></li>
                <li><a href="">Mysql</a></li>
                <li><a href="">PHP</a></li>
                <li><a href="">jQuery</a></li>
                <li><a href="">Mysql</a></li>
                <li><a href="">PHP</a></li>
            </ul>
            <a href="" class="change">修改兴趣</a>
        </div>

        <!-- box核心内容区 -->
        <div class="box main ">
            <div class="box-hd">
                <h3>精品推荐</h3>
                <a href="">查看全部</a>
            </div>
            <div class="box-bd">
                <ul class="clearfax">
                    <li>
                        <img src="stu_imgs/pic.png">
                        <h4>python基于Django的博客系统实战项目演练</h4>
                        <div class="info">
                            <span style="color: red;">高级</span> - 16726人学习
                        </div>
                    </li>
                    <li>
                        <img src="stu_imgs/pic.png">
                        <h4>python基于Django的博客系统实战项目演练</h4>
                        <div class="info">
                            <span style="color: red;">高级</span> - 16726人学习
                        </div>
                    </li>
                    <li>
                        <img src="stu_imgs/pic.png">
                        <h4>python基于Django的博客系统实战项目演练</h4>
                        <div class="info">
                            <span style="color: red;">高级</span> - 16726人学习
                        </div>
                    </li>
                    <li>
                        <img src="stu_imgs/pic.png">
                        <h4>python基于Django的博客系统实战项目演练</h4>
                        <div class="info">
                            <span style="color: red;">高级</span> - 16726人学习
                        </div>
                    </li>
                    <li>
                        <img src="stu_imgs/pic.png">
                        <h4>python基于Django的博客系统实战项目演练</h4>
                        <div class="info">
                            <span style="color: red;">高级</span> - 16726人学习
                        </div>
                    </li>
                    <li>
                        <img src="stu_imgs/pic.png">
                        <h4>python基于Django的博客系统实战项目演练</h4>
                        <div class="info">
                            <span style="color: red;">高级</span> - 16726人学习
                        </div>
                    </li>
                    <li>
                        <img src="stu_imgs/pic.png">
                        <h4>python基于Django的博客系统实战项目演练</h4>
                        <div class="info">
                            <span style="color: red;">高级</span> - 16726人学习
                        </div>
                    </li>
                    <li>
                        <img src="stu_imgs/pic.png">
                        <h4>python基于Django的博客系统实战项目演练</h4>
                        <div class="info">
                            <span style="color: red;">高级</span> - 16726人学习
                        </div>
                    </li>
                    <li>
                        <img src="stu_imgs/pic.png">
                        <h4>python基于Django的博客系统实战项目演练</h4>
                        <div class="info">
                            <span style="color: red;">高级</span> - 16726人学习
                        </div>
                    </li>
                    <li>
                        <img src="stu_imgs/pic.png">
                        <h4>python基于Django的博客系统实战项目演练</h4>
                        <div class="info">
                            <span style="color: red;">高级</span> - 16726人学习
                        </div>
                    </li>
                </ul>
            </div>
        </div>

        <!-- 底部区域 -->
        <div class="footer">
            <div class="main">
                <div class="lef">
                    <img src="stu_imgs/logo.png">
                    <p>学成在线致力于普及中国最好的教育它与中国一 流大学和机构合作提供在线课程。</p>
                    <a href="">下载APP</a>


                </div>
                <div class="rig">
                    <dl>
                        <dt>关于学成网</dt>
                        <dd><a href="">关于</a></dd>
                        <dd><a href="">招贤纳士</a></dd>
                        <dd><a href="">联系我们</a></dd>
                        <dd><a href="">帮助</a></dd>
                    </dl>
                    <dl>
                        <dt>关于学成网</dt>
                        <dd><a href="">关于</a></dd>
                        <dd><a href="">招贤纳士</a></dd>
                        <dd><a href="">联系我们</a></dd>
                        <dd><a href="">帮助</a></dd>
                    </dl>
                    <dl>
                        <dt>关于学成网</dt>
                        <dd><a href="">关于</a></dd>
                        <dd><a href="">招贤纳士</a></dd>
                        <dd><a href="">联系我们</a></dd>
                        <dd><a href="">帮助</a></dd>
                    </dl>


                </div>
            </div>


        </div>
    </body>
</html>
浮动案例css
* {
    padding: 0;
    margin: 0;
}

li {
    list-style: none;
}

.clearfax:after,
.clearfax:before {
    content: "";
    display: table;
    height: 0;
    clear: both;
    visibility: hidden;
}

.clearfax {
    *zoom: 1;
}

.main {
    width: 1200px;
    margin: auto;
}

a {
    text-decoration: none;
}

a:hover {
    border-bottom: #ADFF2F solid 2px;
}

.header {
    height: 42px;
    /* background: pink; */
    margin: 30px auto;
}

.log {
    width: 198px;
    height: 42px;
    /* background: purple; */
    float: left;
}

.nav {
    float: left;
    margin-left: 60px;

}

.nav ul li {
    float: left;
    padding-left: 30px;
}

.nav ul li a {
    display: block;
    height: 42px;
    line-height: 42px;
    font-size: 1.125rem;
    color: #050505;
}

.search {
    width: 412px;
    height: 42px;
    background: lightblue;
    float: left;
    margin-left: 60px;
}

.search input {
    height: 40px;
    width: 345px;
    border: solid #ADFF2F 1px;
    border-right: none;
    font-size: 0.875rem;
    color: #bfbfbf;
    padding-left: 15px;
    float: left;
}

.search button {
    background-image: url(stu_imgs/btn.png);
    width: 50px;
    height: 42px;
    float: left;
    border: 0;
}

.user {
    float: right;
    height: 42px;
    margin-right: 30px;
    font-size: 0.875rem;
    color: #666666;
}

.user img {
    margin: auto 0px;
}

.bander {
    background: url(stu_imgs/banner2_20190819_210028.png) no-repeat top center;
    height: 420px;
}

.subnav {
    background: rgba(0, 0, 0, 0.2);
    width: 190px;
    height: 420px;
    float: left;
}

.subnav ul li {
    height: 46px;
    /* padding: 0px 20px; */
    margin: 0px 20px;

}

.subnav ul li a:hover {
    border-bottom: none;
    color: #00a4ff;
}

.subnav ul li a {
    font-size: 16px;
    color: #fff;
    line-height: 46px;
}

.subnav ul li a span {
    float: right;
}

.stutab {
    width: 230px;
    height: 300px;
    background: #fff;
    float: right;
    margin-top: 50px;
}

.stutab h2 {
    height: 48px;
    color: #9bceea;
    text-align: center;
    font-size: 18px;
    line-height: 48px;
}

.stutab .bd {
    padding: 0px 20px;
}

.bd ul li a h4 {
    color: #4e4e4e;
    font-size: 16px;
}

.bd ul li a p {
    font-size: 12px;
}

.bd ul li {
    padding: 15px 0px;
    border-bottom: solid 1px #ccc;
}

.bd .count {
    display: block;
    height: 38px;
    line-height: 38px;
    border: #00A4FF 2px solid;
    margin: 0px auto;
    text-align: center;
    margin-top: 5px;
}

.goods {
    height: 60px;
    background: #fff;
    box-shadow: 0 2px 3px 3px rgba(0, 0, 0, 0.1);
    margin-top: 10px;
    line-height: 60px;

}

.goods h3 {
    float: left;
    margin-left: 30px;
    font-size: 1rem;
    color: #00A4FF;
}

.goods ul {
    float: left;
    padding-left: 50px;
}

.goods ul li {
    float: left;
}

.goods ul li a {
    padding: 0px 30px;
    font-size: 1rem;
    color: #050505;
    border-left: #888888 solid 1px;
}

.change {
    float: right;
    margin-right: 30px;
    font-size: 1rem;
    color: #00A4FF;
}

.box {
    margin-top: 30px;
}

.box-hd {
    height: 45px;
}

.box-hd h3 {
    float: left;
    font-size: 1.25rem;
    color: #494949;
    margin-left: 20px;
}

.box-hd a {
    float: right;
    font-size: 0.75rem;
    color: #a5a5a5;
    margin-top: 10px;
    margin-right: 30px;
}

.box-bd ul li {
    height: 270px;
    width: 228px;
    background: #fff;
    float: left;
    margin-right: 15px;
    position: relative;
}
.hot {
    position: absolute;
    top: 5px;
    right: -4px;

}

.box-bd ul {
    width: 1225px;
}

.box-bd ul li > img {
    width: 100%;
}

.box-bd ul li h4 {
    margin: 20px 20px 20px 25px;
    font-size: 0.875rem;
    color: #050505;
    font-weight: 400;
}

.info {
    margin: 0px 20px 0px 25px;
    font-size: 13px;
    color: #999;
}

.footer {
    height: 415px;
    background: #fff;

}

.lef {
    float: left;
}
.rig {
    float: right;
}
.footer .main {
    padding-top: 35px;
}

.lef p {
    font-size: 12px;
    color: #666;
    margin: 20px 0px 15px 0px;
}
.lef a {
    display: block;
    width: 118px;
    height: 33px;
    border: solid 2px skyblue;
    color: blue;
    font-size: 1rem;
    line-height: 33px;
    text-align: center;
}
.rig dl dt {
    font-size: 1rem;
    color: #333;
}
.rig dl dd {
    margin-bottom: 5px;
}
.rig dl dd a {
    font-size: 14px;
}
.rig dl {
    float: left;
    margin-left: 100px;
}
.rig dl dd a:hover{
    border: 0;
}
相对定位
<!DOCTYPE html>
<html>
    <head>
        <meta charset="utf-8">
        <title></title>
        <style>
            .box1 {
                position: relative;
                top: 100px;
                left: 100px;
                width: 200px;
                height: 200px;
                background: pink;
            }
            .box2 {
                width: 200px;
                height: 200px;
                background: greenyellow;
            }
        </style>
    </head>
    <body>

            <div class="box1"></div>
            <div class="box2"></div>

        <!--
         定位: 定位模式 + 边偏移, 标准流和浮动是无法使用定位的,定位的盒子
         static: 静态定位,默认定位方式,无定位的意思很少使用(了解就行)
         relative: 相对定位,元素移动位置的时候,是参照他原来的位置来位移的,盒子定位移动之后不脱标,保留原来的位置
         -->
    </body>
</html>
绝对定位
<!DOCTYPE html>
<html>
    <head>
        <meta charset="utf-8">
        <title></title>
        <style>
            .yeye {
                position: relative;
                height: 600px;
                width: 600px;
                background: #00A4FF;
            }
            .father {
                width: 200px;
                height: 200px;
                background: #87CEEB;
            }


            .son {
                position: absolute;
                bottom: 50px;
                left: 30px;

                width: 100px;
                height: 100px;
                background: greenyellow;

            }

            .two {
                background: #666666;
                width: 50px;
                height: 50px;
            }
        </style>
    </head>
    <body>
        <div class="yeye">
            <div class="father">
                <div class="son"> 1 </div>
                <div class="two"> 2 </div>
            </div>
        </div>


        <!--
         定位: 定位模式 + 边偏移, 标准流和浮动是无法使用定位的,定位的盒子
         static: 静态定位,默认定位方式,无定位的意思很少使用(了解就行)
         absolute: 如果没有祖先元素或者祖先元素没有定位则以浏览器进行定位
            ps: 如果祖先元素有定位,那么则按照 最近一级 祖先元素的位置来进行位移
            绝对定位不保留原有位置,脱离标准流, 下面的盒子会顶上来
         -->
    </body>
</html>
子绝父相案例(hot小图标)

<!DOCTYPE html>
<html>
    <head>
        <meta charset="utf-8">
        <title></title>
        <link rel="stylesheet" type="text/css" href="stu.css" />

        <style type="text/css">


        </style>
    </head>
    <body>
        <!-- box核心内容区 -->
        <div class="box main ">
            <div class="box-hd">
                <h3>精品推荐</h3>
                <a href="">查看全部</a>
            </div>
            <div class="box-bd">
                <ul class="clearfax">
                    <li>
                        <em class="hot"><img src="stu_imgs/hot.png" ></em>  <!-- 添加定位 -->
                        <img src="stu_imgs/pic.png">
                        <h4>python基于Django的博客系统实战项目演练</h4>
                        <div class="info">
                            <span style="color: red;">高级</span> - 16726人学习
                        </div>
                    </li>

                </ul>
            </div>
        </div>

            <div class="main">
                <div class="lef">
                    <img src="stu_imgs/logo.png">
                    <p>学成在线致力于普及中国最好的教育它与中国一 流大学和机构合作提供在线课程。</p>
                    <a href="">下载APP</a>


                </div>
                <div class="rig">
                    <dl>
                        <dt>关于学成网</dt>
                        <dd><a href="">关于</a></dd>
                        <dd><a href="">招贤纳士</a></dd>
                        <dd><a href="">联系我们</a></dd>
                        <dd><a href="">帮助</a></dd>
                    </dl>
                    <dl>
                        <dt>关于学成网</dt>
                        <dd><a href="">关于</a></dd>
                        <dd><a href="">招贤纳士</a></dd>
                        <dd><a href="">联系我们</a></dd>
                        <dd><a href="">帮助</a></dd>
                    </dl>
                    <dl>
                        <dt>关于学成网</dt>
                        <dd><a href="">关于</a></dd>
                        <dd><a href="">招贤纳士</a></dd>
                        <dd><a href="">联系我们</a></dd>
                        <dd><a href="">帮助</a></dd>
                    </dl>


                </div>
            </div>


        </div>
    </body>
</html>
固定定位
<!DOCTYPE html>
<html>
    <head>
        <meta charset="utf-8">
        <title></title>
        <style type="text/css">

            .dj {
                position: fixed;
                top: 100px;
                right: 40px;

            }
        </style>
    </head>
    <body>
        <div class="dj">
            <img src="stu_imgs/pvp.png" >
        </div>


        <div style="height: 1000px; background: pink;"></div>


        <!--
        固定定位是以浏览器的可视窗口为参照点的 , 跟父元素没关系,不随着鼠标滚动而滚动,
        固定定位也是脱标的,不保留原有位置,脱离标准流, 下面的盒子会顶上来
         -->
    </body>
</html>
固定定位技巧,根据版心定位
<!DOCTYPE html>
<html>
    <head>
        <meta charset="utf-8">
        <title></title>


        <style type="text/css">
            .main {
                width: 800px;
                height: 1400px;
                background: pink;
                margin: 0 auto;
            }

            .sub {
                position: fixed;
                left: 50%;

                margin-left: 400px;
                width: 50px;
                height: 150px;
                background: skyblue;
            }
        </style>
    </head>
    <body>
    </body>
    <div class="sub">
        小导航
    </div>

    <div class="main">
        版心盒子宽800
    </div>


    <!--
    1. 让固定定位的盒子的 左或者右使用 百分比定位 50%,
    2. 再给导航设置 外边距为版心的一半即可
     -->
</html>
粘性定位
<!DOCTYPE html>
<html>
    <head>
        <meta charset="utf-8">
        <title></title>
        <style type="text/css">
            body {
                height: 3000px;
            }
            .nx {
                position: sticky;
                top: 0px;

                margin: 100px auto;
                width: 800px;
                height: 50px;
                background: pink;
            }
        </style>
    </head>
    <body>
        <div class="nx">
            粘性定位框
        </div>
        <p>1</p>
        <p>2</p>


        <!--
         sticky: 粘性定位以浏览器的可视窗口为参照移动元素,
         粘性定位占有原来的位置(相对定位的特点)
         必须添加 top right lef bottom 其中一个才有效
         随着可视窗口的滚动而移动,到设置的值处停止移动-->
    </body>
</html>
定位叠放权重顺序
<!DOCTYPE html>
<html>
    <head>
        <meta charset="utf-8">
        <title></title>
        <style type="text/css">
            .box {
                position: absolute;
                top: 0;
                left: 0;
                width: 200px;
                height: 200px;
            }
            .xiongda {
                background: pink;
                z-index: 1;
            }
            .xionger {
                background: #87CEEB;
                left: 50px;
                top: 50px;
                z-index: 2;
            }
            .guantou {
                background: sandybrown;
                left: 100px;
                top: 100px;
            }
        </style>
    </head>
    <body>

        <div class="box xiongda">熊大</div>
        <div class="box xionger">熊二</div>
        <div class="box guantou">光头强</div>

        <!--
         z-index: 可以设置盒子定位的权重, 只有定位的盒子才有这个属性
         数值可以为正数 负数 和 0 默认是 auto 数值越大,盒子权重越大
         如果属性值相同,则下面的权重最高


         -->
    </body>
</html>
使用绝对定位让盒子垂直居中
<!DOCTYPE html>
<html>
    <head>
        <meta charset="utf-8">
        <title></title>
        <style type="text/css">
            .box {
                position: absolute;
                left: 50%;
                top: 50%;

                width: 200px;
                height: 200px;
                background: pink;

                /* margin-left: -100px; */
                /* margin-top: -100px; */

                transform: translate(-50%,-50%);
            }
        </style>
    </head>
    <body>
        <div class="box">

        </div>

        <!--
         加了绝对定位和固定定位的盒子,脱离了标准流,不能通过margin: auto;水平居中,但是可以通过css 算法来实现
         1. 盒子定位父元素宽度的50%(有点跑偏)
         2. margin 往左边走自己盒子宽度的一半 给个负数即可
         或者使用 transform 使其便宜自身的一半
         -->
    </body>
</html>
定位特殊性(脱离标准流)
<!DOCTYPE html>
<html>
    <head>
        <meta charset="utf-8">
        <title></title>
        <style type="text/css">
            span {
                position: fixed;
                /* float: left; */
                /* top: 100px; */

                width: 200px;
                height: 200px;
                background: pink;
            }

            div {
                /* position: absolute; */
                background: skyblue;
            }
        </style>
    </head>
    <body>

        <span>123</span>
        <div>你好你好你好你好你好你好你好你好你好你好你好你好</div>


        <!--
         绝对定位和固定定位,会让元素脱离标准流
         1. 行内元素添加绝对或者固定定位,不需要转换即可设置高度和宽度
         2. 块级元素添加绝对和固定定位,如果不给宽度和高度,默认大小是内容的大小
         3. 和浮动不同的是,定位会完全压住下面标准流的内容,而不是挤开
         -->
    </body>
</html>
定位案例(淘宝广告)
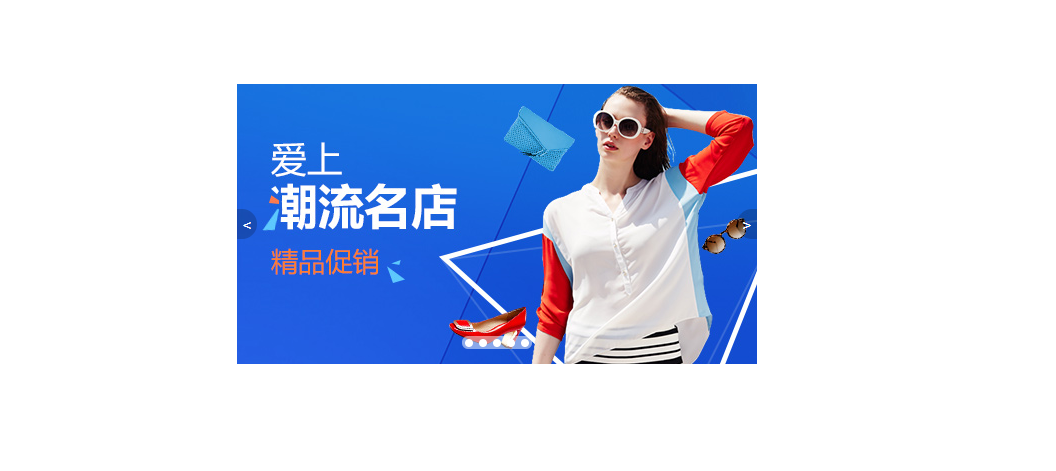
<!DOCTYPE html>
<html>
    <head>
        <meta charset="utf-8">
        <title></title>
        <style type="text/css">
            * {
                padding: 0;
                margin: 0;
            }
            .tb_promo {
                position:relative;
                width: 520px;
                height: 280px;
                background: pink;
                margin: 100px auto;
            }
            .tb_promo img {
                width: 520px;
                height: 280px;
            }

            .pref, .next {
                position: absolute;
                top: 50%;

                height: 30px;
                width: 20px;
                background: rgba(0,0,0,0.2);
                line-height: 30px;
                text-align: center;
                text-decoration: none;
                color: #fff;
                margin-top: -15px;
            }
            .pref {
                left: 0;
                border-top-right-radius: 15px;
                border-bottom-right-radius: 15px;
            }
            .next {
                right: 0;
                border-top-left-radius: 15px;
                border-bottom-left-radius: 15px;
            }

            .more {
                position: absolute;
                bottom: 15px;
                left: 50%;

                margin-left: -35px;

                background-color: rgba(255,255,255,0.5);
                width: 70px;
                height: 13px;
                border-radius: 7px;
            }
            .more li {
                width: 8px;
                height: 8px;
                background: #fff;
                list-style: none;
                float: left;
                border-radius: 50%;
                margin: 3px;
            }
            .more li:hover{
                background: #ff5000;
            }
        </style>
    </head>
    <body>


        <div class="tb_promo">
            <img src="stu_imgs/tb.jpg" >
            <a href="" class="pref"><</a>
            <a href="" class="next">></a>

            <ul class="more">
                <li></li>
                <li></li>
                <li></li>
                <li></li>
                <li></li>
            </ul>
        </div>

    </body>
</html>
display
<!DOCTYPE html>
<html>
    <head>
        <meta charset="utf-8">
        <title></title>
        <style>
            .peiqi {
                display: none;
                width: 200px;
                height: 200px;
                background: pink;
            }

            .qiaozhi {
                width: 200px;
                height: 200px;
                background: #87CEEB;
            }
        </style>
    </head>
    <body>

        <div class="peiqi">
            佩奇
        </div>
        <div class="qiaozhi">
            乔治
        </div>

        <!--
         display: none 会让元素隐藏,并且不再占有原来的位置
         display: block 除了转换为块级元素之外,同时还有显示元素的意思
         -->
    </body>
</html>
visibility
<!DOCTYPE html>
<html>
    <head>
        <meta charset="utf-8">
        <title></title>
        <style type="text/css">
            .mather {
                width: 200px;
                height: 200px;
                background: pink;
            }

            .father {
                visibility: hidden;
                width: 200px;
                height: 200px;
                background: #87CEEB;
            }
        </style>
    </head>
    <body>

        <div class="father">
            猪爸爸
        </div>
        <div class="mather">
            猪妈妈
        </div>
        <!--
        visibility: hidden 隐藏元素后继续占有原来的位置

         -->
    </body>
</html>
overflow
<!DOCTYPE html>
<html>
    <head>
        <meta charset="utf-8">
        <title></title>
        <style type="text/css">
            .box {
                /* overflow: visible; */
                /* overflow: hidden; */
                /* overflow: scroll; */
                overflow: auto;
                width: 200px;
                height: 200px;
                background: pink;
            }
        </style>
    </head>
    <body>


        <div class="box">
            《小猪佩奇》,又名《粉红猪小妹》(台湾名为粉红猪),英文名为《Peppa
            Pig》,是由英国人阿斯特利(Astley)、贝克(Baker)、戴维斯(Davis)创作、导演和制作的一部英国学前电视动画片,也是历年来最具潜力的学前儿童品牌。故事围绕小猪佩奇与家人的愉快经历,幽默而有趣,藉此宣扬传统家庭观念与友情,鼓励小朋友们体验生活。
        </div>

        <!--
        overflow: visible 默认选项
            hidden 把多出来的内容隐藏
            scroll 显示滚动条
            auto 在需要的时候添加滚动条 自动
         -->
    </body>
</html>
遮罩层练习案例
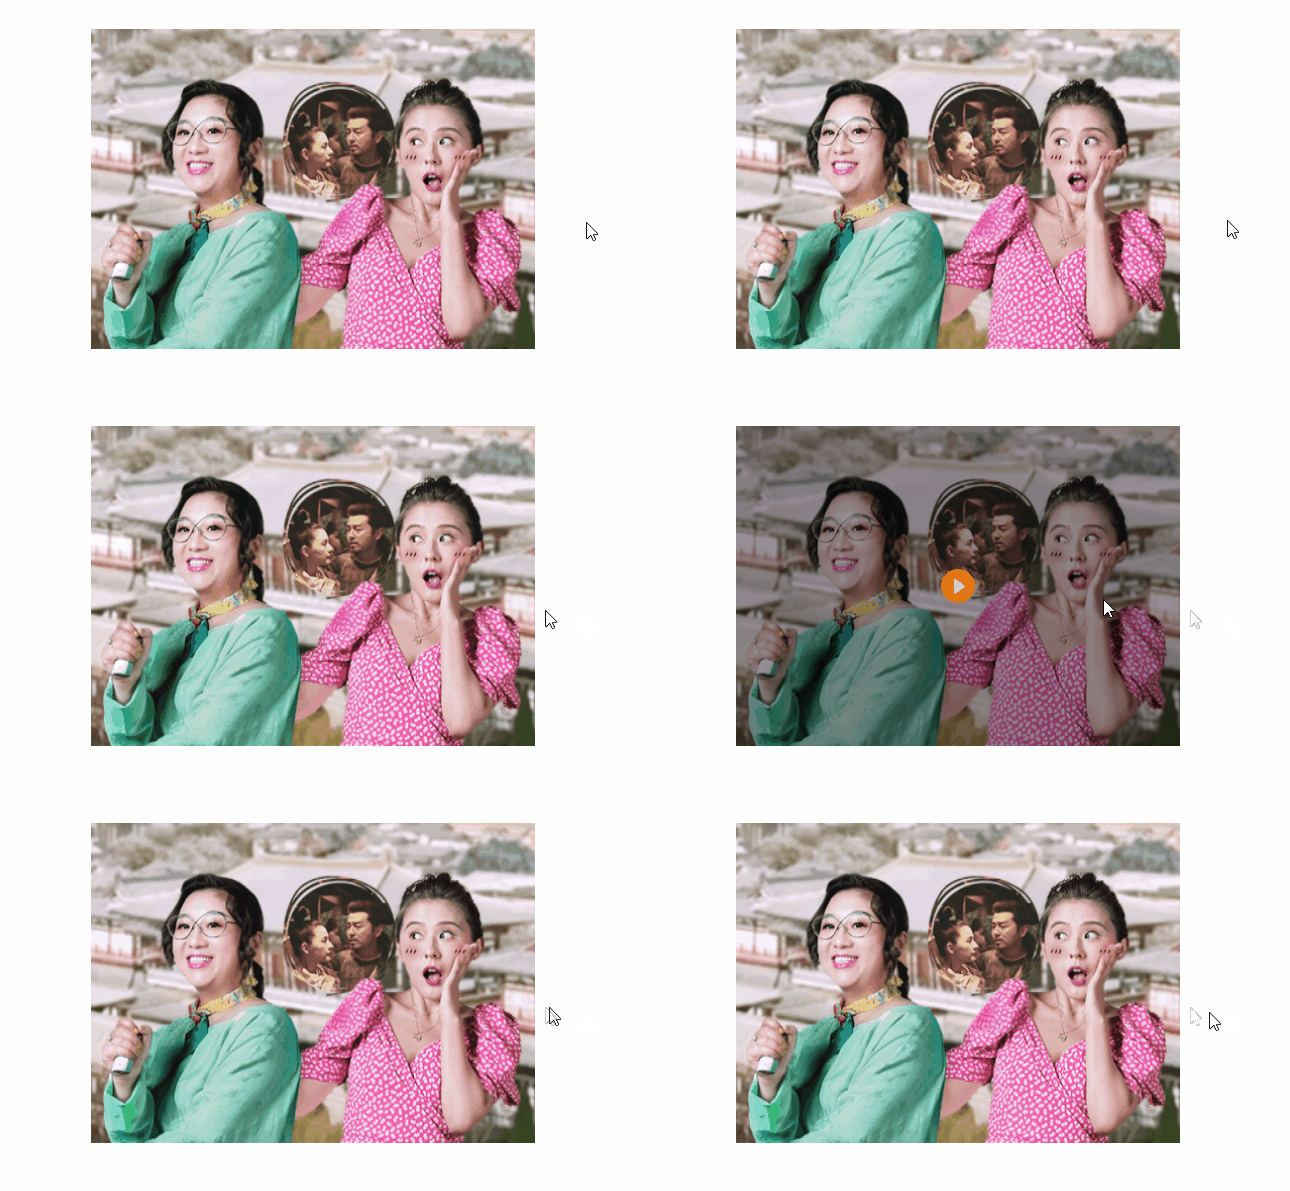
<!DOCTYPE html>
<html>
    <head>
        <meta charset="utf-8">
        <title></title>
        <style type="text/css">
            .main {
                position: relative;
                width: 444px;
                height: 320px;
                background: pink;
                margin: 100px auto;
            }
            .main img {
                width: 100%;
                height: 100%;
            }
            .mask {
                position: absolute;
                top: 0;
                left: 0;

                display: none;
                width: 100%;
                height: 100%;
                background: rgba(0,0,0,0.4) url(stu_imgs/arr.png) no-repeat center;
            }

            /* 当鼠标经过main这个大盒子的时候, 就让里面的遮罩显示出来 */
            .main:hover .mask{
                display: block;
            }
        </style>
    </head>
    <body>

        <div class="main">
            <img src="stu_imgs/tudou.jpg" >
            <div class="mask">

            </div>
        </div>
    </body>
</html>
精灵图
<!DOCTYPE html>
<html>
    <head>
        <meta charset="utf-8">
        <title></title>

        <style type="text/css">
            .box1 {
                width: 60px;
                height: 60px;
                margin: 100px auto;
                background: url(stu_imgs/sprites.png) no-repeat;
                background-position: -182px 0;
            }
            .box2 {
                width: 25px;
                height: 25px;
                background: url(stu_imgs/sprites.png) no-repeat;
                background-position: -155px -106px;
            }
        </style>
    </head>
    <body>

        <div class="box1">

        </div>

        <div class="box2">

        </div>
        <!--
         精灵技术主要针对背景小图片的使用,就是把很多小图片集合到一个大图片中,减少客户端请求服务器的次数
         -->
    </body>
</html>
使用边框绘制等腰三角形
<!DOCTYPE html>
<html>
    <head>
        <meta charset="utf-8">
        <title></title>

        <style type="text/css">

            .box1 {
                width: 0;
                height: 0;
                /* border: 10px solid pink; */
                border-top: 10px solid red;
                border-bottom: 10px solid greenyellow;
                border-right: 10px solid skyblue;
                border-left: 10px solid yellow;

                /* 兼容性设置 */
                font-size: 0;
                line-height: 0;
            }

            .box2 {
                width: 0;
                height: 0;
                border: 100px solid transparent;
                border-top-color: pink;
                margin: 100px auto;

                /* 兼容性设置 */
                font-size: 0;
                line-height: 0;
            }

        </style>
    </head>
    <body>
        <div class="box1">

        </div>

        <div class="box2">

        </div>
    </body>
</html>
直角三角形
<!DOCTYPE html>
<html>
    <head>
        <meta charset="utf-8">
        <title></title>

        <style type="text/css">
            .san {
                width: 0;
                height: 0;

                border-top: 100px solid transparent;
                border-right: 50px solid pink;
                /* border-left: 50px solid gray; */
                border-bottom: 0;
                float: right;
            }

            .box {
                width: 200px;
                height: 100px;
                float: left;
            }
        </style>
    </head>
    <body>


        <div class="box" style="background: greenyellow;">
            <div class="san"></div>
        </div>
        <div class="box" style="background: pink;"></div>

    </body>
</html>
三角形练习
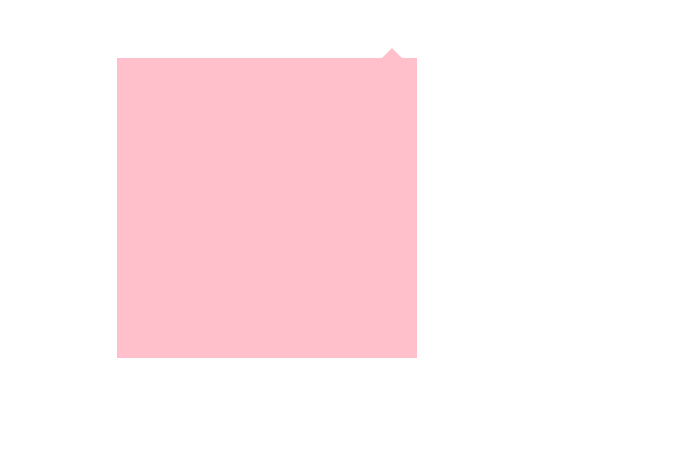
<!DOCTYPE html>
<html>
    <head>
        <meta charset="utf-8">
        <title></title>
        <style type="text/css">
            .jd {
                position: relative;
                height: 300px;
                width: 300px;
                background: pink;
                margin: 100px auto;
            }
            .jd span {
                position: absolute;
                right: 15px;
                top: -20px;

                border: solid 10px transparent;
                border-bottom-color: pink;
                font-size: 0;
                line-height: 0;
            }
        </style>
    </head>
    <body>
        <div class="jd">
            <span></span>
        </div>
    </body>
</html>
更改鼠标样式
<!DOCTYPE html>
<html>
    <head>
        <meta charset="utf-8">
        <title></title>
        <style type="text/css">
            div {
                width: 100px;
                height: 30px;
                background: pink;
                margin: 5px auto;
                text-align: center;
                line-height: 30px;
            }
        </style>
    </head>
    <body>
        <div style="cursor: default;">默认</div>
        <div style="cursor: pointer;">小手</div>
        <div style="cursor: move;">移动</div>
        <div style="cursor: text;">文本</div>
        <div style="cursor: not-allowed;">禁止</div>
    </body>
</html>
表单轮廓线(文本域防止拖拽)
<!DOCTYPE html>
<html>
    <head>
        <meta charset="utf-8">
        <title></title>
        <style type="text/css">
            input, textarea {
                outline: none;  /* 取消轮廓线 */
            }
            textarea {
                resize: none;  /* 防止拖拽 */
            }
        </style>
    </head>
    <body>
        <input type="text" />
        <textarea rows="3" cols="20"></textarea>
    </body>
</html>
vertical-align设置元素对齐方式
<!DOCTYPE html>
<html>
    <head>
        <meta charset="utf-8">
        <title></title>
        <style type="text/css">
/*          body {
                font-size: 20px;
            } */

            img {
                /* vertical-align: bottom; */  /* 设置对齐方式为底线对齐 */
                /* vertical-align: middle; */  /* 设置对齐方式为中间线对齐 */
                vertical-align: top;  /* 设置对齐方式为顶线对齐 */
            }
            textarea {
                vertical-align: middle;
            }
        </style>
    </head>

    <body>

        <img src="stu_imgs/ldh.jpg" >jQuery Hello
        <br>
        <textarea rows="" cols="">
        </textarea>jQuery Hello

        <!--

         在 html 中 行内块元素默认和基线对齐,但是会有一些字符和图片显示不在一行的问题
         -->
    </body>
</html>
小技巧多余字符转为省略号
<!DOCTYPE html>
<html>
    <head>
        <meta charset="utf-8">
        <title></title>

        <style type="text/css">
            div {
                width: 150px;
                height: 80px;
                background: pink;
                margin: 0 auto;
                /* white-space: normal;  如果文字显示不开那么自动换行 */
                white-space: nowrap;  /* 如果文字显示不开那么自动换行 */
                overflow: hidden;
                text-overflow: ellipsis;
            }


        </style>
    </head>
    <body>
        <div>
            啥也不说了,此处省略一万字
        </div>
        <!--
        单行为本溢出转为省略号,必须满足3个条件,
            1: 强制一行内显示文本,white-space: nowrap; 设置文本不换行
            2. 超出部分隐藏, overflow: hidden;
            3. 文字用省略号代替超出部分 text-overflow: ellipsis;
         -->
    </body>
</html>
小技巧margin设置负值消除边框
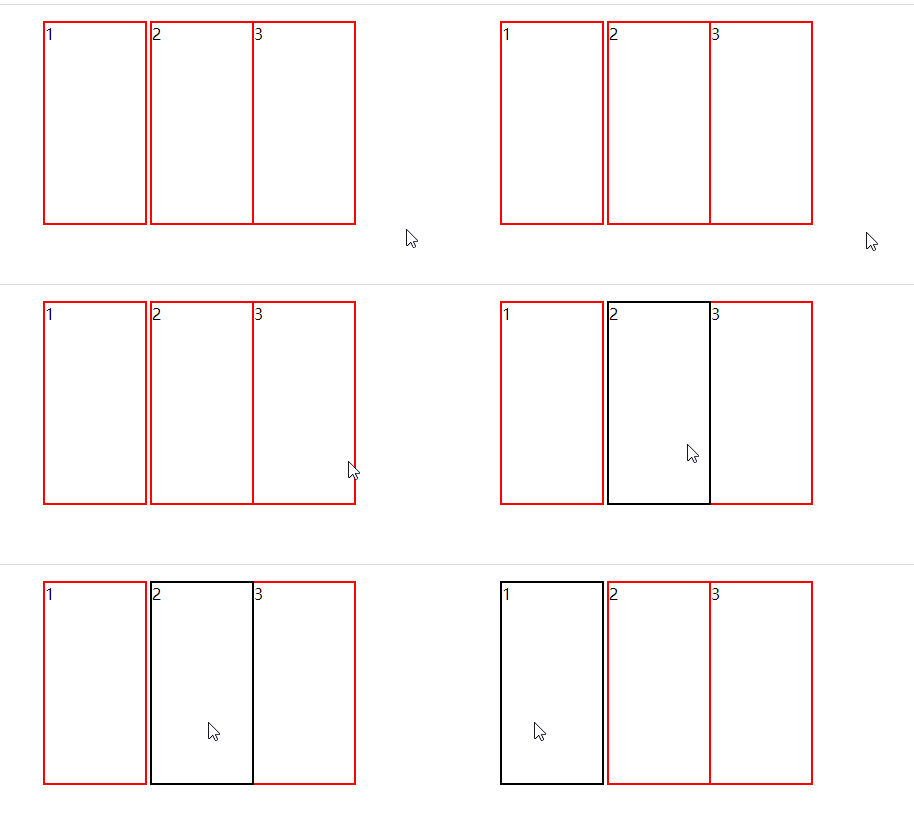
<!DOCTYPE html>
<html>
    <head>
        <meta charset="utf-8">
        <title></title>
        <style type="text/css">
            li {
                position: relative;
                display: inline-block;
                list-style: none;
                height: 200px;
                width: 100px;
                border: 2px solid red;
                margin-left: -2px;
            }
            li:hover {
                /* 1. 如果盒子没有定位,给鼠标添加相对定位即可 */
                position: relative;
                border-color: black;
                /* 2. 如果盒子都有定位,那么鼠标移上来的时候给盒子设置较高的定位权重 */
                z-index: 999;
            }

        </style>
    </head>
    <body>


        <ul>
            <li>1</li>
            <li>2</li><li>3</li>
        </ul>

        <!--
        相对定位会保留原位置,并覆盖文档流
        如果 li 都有定位那么可以在 hover 时设置较高的层级也能实现蓝色边框的问题
         -->
    </body>
</html>
css3新特性
<!DOCTYPE html>
<html>
    <head>
        <meta charset="utf-8">
        <title></title>
        <style type="text/css">
            header,
            nav {
                height: 120px;
                background: pink;
                border-radius: 15px;
                text-align: center;
                line-height: 120px;
                margin: 10px auto;
            }

            video {
                width: 100%;
            }

            input::placeholder {
                color: pink;
            }
        </style>
    </head>
    <body>
        <!-- 新增一些标签 -->
        <header>
            头部标签
        </header>
        <nav>
            导航栏标签
        </nav>

        <!-- 视频格式标签: 支持mp4 webm ogg -->
        <video src="media/mi.mp4" autoplay="autoplay" muted="muted" controls="controls" loop="loop"></video>

        <!-- 音频格式标签: mp3 wav ogg -->
        <audio src="media/music.mp3" controls="controls">
            当前浏览器不支持audio
        </audio>

        <br>
        <form action="" method="">
            <!-- 新增input属性 -->
            <input type="number" required="required"/>只允许输入数字 <br>
            <input type="search" placeholder="请输入关键字" autofocus="autofocus"/>搜索 <br>
            <input type="email" />邮箱 <br>
            <input type="tel" />手机号 <br>
            <input type="url" />网址 <br>
            <input type="date" />日期 <br>
            <input type="time" />时间 <br>
            <input type="color" />颜色 <br>
            <input type="file" multiple="multiple"/> 文件<br>
            <input type="submit" id="" name="" />
            <!-- 新增设置属性 -->
            <!--
            required: 必填设置
            placeholder: 文本提示
            autofocus: 自动获取焦点
            multiple: 搭配文件域来使用 多选文件
             -->
        </form>
    </body>
</html>
css3新增属性选择器结构选择器
<!DOCTYPE html>
<html>
    <head>
        <meta charset="utf-8">
        <title></title>
        <style type="text/css">
            input[value] {
                color: pink;
            }
            input[value='2333'] {
                color: red;
            }

            input[value^='hello'] {
                color: yellowgreen;
            }

            ul :first-child {  /* 选择 ul 下的第一个元素 */
                color: red;
            }
            ul li:first-child{  /* 选择 ul 下的第一个 li 元素 */
                color: red;
            }
            ul :last-child {  /* 选择ul的最后一个元素 */
                color: #00A4FF;
            }

            ul :nth-child(2) {  /* 选择ul 下的第二个元素 */
                color: pink;
            }
            ul :nth-child(even) {  /* 选择ul 下所有的偶数元素 */
                color: pink;
            }
            ul :nth-child(odd) {  /* 选择ul 下所有的奇数元素 */
                color: green;
            }


            ol:nth-child(n) {  /* 选择ol下的所有的元素 */
                color: red;
            }

            /* 指定选择的为li元素 */
            ol li:nth-child(2n) {  /* 选择ol下的li的所有的2的倍数元素 */
                color: pink;
            }

            ol li:nth-child(n+2) {  /* 选择ol下的li的第二个元素和之后的元素 */
                color: greenyellow;
            }

            ol li:nth-child(-n+5) {  /* 选择ol下的li的第五个元素和之前的 */
                color: sandybrown;
            }

        </style>
    </head>
    <body>
        <!-- 利用属性选择器可以不借助于类或者id选择器 -->
        <input type="text" value="请输入用户名"/>

        <br>
        <!-- 匹配属性值来进行选择 -->
        <input type="text" value="2333"/>

        <br>
        <!-- 也可以进行模糊匹配 -->
        <input type="text" value="hello world" />
        <input type="text" value="hello jQuery" />


        <!-- 结构伪类选择器, 选择ul 里面的 第一个 li -->
        <ul>
            <li>1</li>
            <li>2</li>
            <li>3</li>
            <li>4</li>
            <li>5</li>
            <li>6</li>
            <li>7</li>
        </ul>


        <ol>
            <li>1</li>
            <li>2</li>
            <li>3</li>
            <li>4</li>
            <li>5</li>
            <li>6</li>
            <li>7</li>
        </ol>

        <h2> nth-child: 把所有子盒子排列序号,是先看后面 ol li:nth-child(3) : 查看ol下面的第3个元素, 如果此元素是li标签则才能匹配成功,否则匹配失败,编写的样式不会生效</h2>
        <h2> nth-of-type: 会把指定盒子排列序号, ol li:nth-of-type(2),先查找自己本身有几个li标签,然后再查找第2个li标签</h2>
    </body>
</html>
css3伪元素选择器
<!DOCTYPE html>
<html>
    <head>
        <meta charset="utf-8">
        <title></title>

        <style type="text/css">

            div {
                width: 200px;
                height: 200px;
                background: pink;
            }

            div::before {
                display: inline-block;
                width: 50px;
                height: 50px;
                background: #00A4FF;
                content: '我';
            }
            div::after {
                content: '你';
            }
        </style>
    </head>
    <body>


        <div>
            hello
        </div>

        <!--
         before和after 创建一个元素, 但是属于 行内元素,   需要改变display才能改变大小
         新创建的元素在网页中文档树中是无法找到的,所以称为 伪元素
         语法 element::before()
         before和after 必须有content属性
         before在父元素 内容 的前面创建元素,after在 内容 的后面创建元素

         伪元素选择器和标签选择器一样权重为1
         -->
    </body>
</html>
css3盒子模型
<!DOCTYPE html>
<html>
    <head>
        <meta charset="utf-8">
        <title></title>


        <style type="text/css">
            .box1 {
                width: 200px;
                height: 200px;
                background: pink;
                padding: 20px;
                border: 20px solid red;
                box-sizing: content-box;  /* 默认的属性 */
            }
            .box2 {
                width: 200px;
                height: 200px;
                background: pink;
                border: 20px solid red;
                padding: 20px;
                box-sizing: border-box;
            }
        </style>
    </head>
    <body>
        <div class="box1">box1</div>
        <br>
        <div class="box2">box2</div>

        <!--
         box-sizing: border-box; 设置之后 padding 和 border 就不会撑大盒子了
         -->
    </body>
</html>
css3图片滤镜
<!DOCTYPE html>
<html>
    <head>
        <meta charset="utf-8">
        <title></title>

        <style type="text/css">
            img {
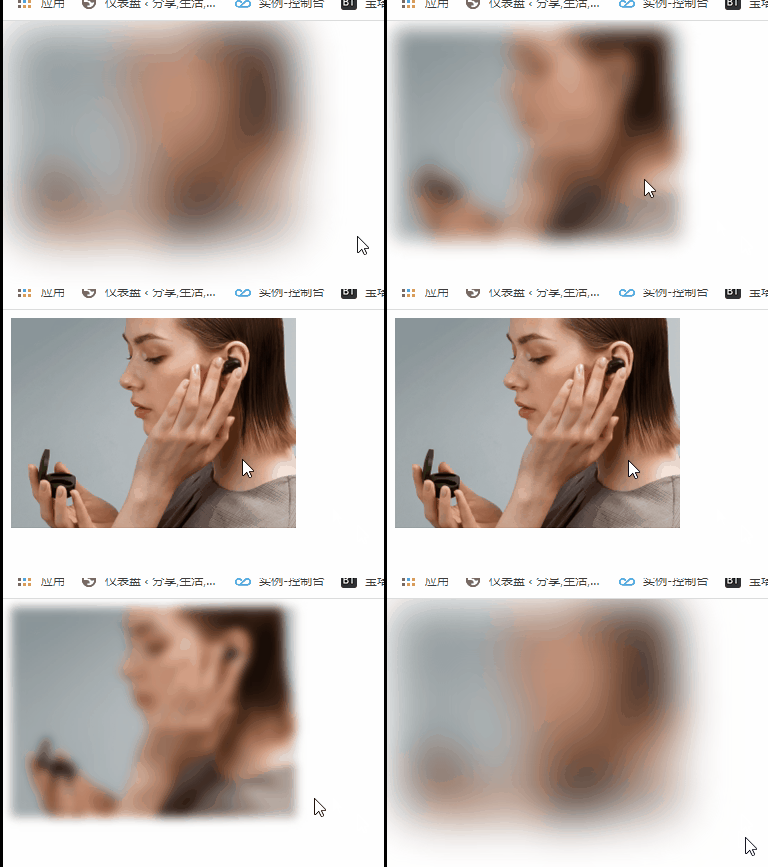
                /* blur 是一个函数, 小括号里面数值越大,就越模糊 */
                filter: blur(22px);
                transition: all 0.1s;
            }

            img:hover {
                filter: blur(0);
            }
        </style>
    </head>
    <body>


        <img src="%25(8XT5_EL_4K65L2KAF@O42.png" >
    </body>
</html>
css3动态计算宽度
<!DOCTYPE html>
<html>
    <head>
        <meta charset="utf-8">
        <title></title>
        <style type="text/css">
            .box1 {
                background: pink;
                width: 200px;
                height: 150px;
            }

            .box2 {
                background: #00A4FF;
                /* width: 170px; */
                width: calc(100% - 30px);
                height: 50px;
            }
        </style>
    </head>
    <body>

        <div class="box1">
            <div class="box2">子盒子永远比父盒子窄30px</div>
        </div>
    </body>
</html>
css3过渡动画
<!DOCTYPE html>
<html>
    <head>
        <meta charset="utf-8">
        <title></title>
        <style type="text/css">

            div {
                width: 200px;
                height: 200px;
                background: pink;
                /* 如果写多个属性可以用逗号隔开 */
                /* transition: width 0.8s ease 0.1s,height 0.3s; */
                /* 如果需要多个属性变化可以使用 all */
                transition: all 0.4s;  /* 写到本身上 */
            }
            div:hover {
                width: 400px;
                height: 100px;
            }
        </style>
    </head>
    <body>
        <div>
            <h2>过渡写到本身上,谁做动画给谁加</h2>
        </div>


        <!--
         transition: 要过渡的属性, 花费时间秒, 运动曲线默认ease就够用了, 何时开始默认0s可以省略
         -->
    </body>
</html>
css3过渡动画案例
<!DOCTYPE html>
<html>
    <head>
        <meta charset="utf-8">
        <title></title>
        <style type="text/css">
            .box1 {
                width: 150px;
                height: 15px;
                border: 1px solid pink;
                border-radius: 5px;

                overflow: hidden;


            }
            .box2 {
                width: 30%;
                height: 15px;
                background: red;
                transition: all 0.4s;
            }
            .box1:hover .box2{
                width: 100%;
            }
        </style>
    </head>
    <body>

        <div class="box1">
            <div class="box2"></div>
        </div>
    </body>
</html>
css3动画 translate移动
<!DOCTYPE html>
<html>
    <head>
        <meta charset="utf-8">
        <title></title>
        <style type="text/css">
            .box1 {
                position: relative;
                width: 300px;
                height: 300px;
                background: pink;
                box-sizing: border-box;
                border: 1px solid #ccc;
            }

            .box2 {
                position: absolute;
                top: 50%;
                left: 50%;
                width: 100px;
                height: 100px;
                background: palegoldenrod;
                /* transform: translate(10px, 20px); */  /* 可以给固定的 X,Y 的距离*/
                transform: translate(-50%,-50%);  /* 也可以给百分比来让元素实现自适应位移 */


            }
            .box3 {
                width: 130px;
                height: 130px;
                background: #00A4FF;
            }
        </style>
    </head>
    <body>
        <div class="box1">
            <div class="box2"></div>
            <div class="box3"></div>
        </div>

        <h3>
            1. translate 中的参数为百分比时,那么移动的百分比为 <span style="color: red;">本身大小</span> 的百分比 <br>
            2. translate 在移动时不会影响到其他盒子的位置 <br>
            3. translate 对行内元素没有效果
        </h3>
    </body>
</html>
css3动画 rotate 旋转
<!DOCTYPE html>
<html>
    <head>
        <meta charset="utf-8">
        <title></title>
        <style type="text/css">
            img {
                width: 100px;
                height: 100px;
                border-radius: 50%;
                border: solid 5px pink;

                transition: all 0.8s ease;  /* 添加动画 */
                transform-origin: 77px 73px;  /* 设置中心点 */
                transform-origin: right bottom;
            }
            img:hover {
                transform: rotate(360deg);
            }

        </style>
    </head>
    <body>
        <img src="bomb.png" >
    </body>

    <h3>
        1. rotate 可以使图片进行旋转,旋转的单位是<span style="color: red;"> deg(角度) </span> <br>
        2. 角度可以为正数(顺时针)或者负数(逆时针)进行旋转控制 <br>
        3. 默认旋转的中心点,是元素的中间(50% 50%), 可以通过 <span style="color: red;">transform-origin: x y</span> 来设置旋转的中心点,可以使用方位名词或者具体的px
    </h3>
</html>
css3动画 rotate 旋转三角箭头
<!DOCTYPE html>
<html>
    <head>
        <meta charset="utf-8">
        <title></title>
        <style type="text/css">
            div {
                border-top: 100px solid pink;
                border-right: 100px solid pink;
                transform: rotate(45deg);

                margin: 100px auto;
                width: 300px;
                height: 300px;
            }
        </style>
    </head>
    <body>
        <div>使用 transform: rotate(45deg); 来让边框旋转45度来模拟旋转的小三角箭头</div>
    </body>
</html>
css3动画 rotate 旋转图片特效
<!DOCTYPE html>
<html>
    <head>
        <meta charset="utf-8">
        <title></title>
        <style type="text/css">
            div {
                width: 100px;
                height: 100px;
                background: #4E4E4E;
                overflow: hidden;
            }

            img {
                width: 100px;
                height: 100px;

                transform-origin: left bottom;  /* 设置旋转中心点 */
                transition: all 0.5s;  /* 设置过渡动画 */

            }

            div:hover img {
                transform: rotate(90deg);  /* 鼠标放在div时让图片旋转 */

            }
        </style>
    </head>
    <body>
        <div>
            <img src="bomb.png" >
        </div>
    </body>
</html>
css3动画 scale 放大缩小
<!DOCTYPE html>
<html>
    <head>
        <meta charset="utf-8">
        <title></title>
        <style type="text/css">
            img {
                width: 100px;
                height: 100px;
                transition: all 0.4s ease;
            }

            img:hover {
                /* transform: scale(2,2);  放大一倍 */
                /* transform: scale(0.5,0.5);  缩小一倍 */
                transform: scale(2);  放大一倍等同于: scale(2,2)

            }
        </style>
    </head>
    <body>
        <img src="bomb.png" >

        <h3>
            1. 缩放的最大优势秒就是可以设置中心点缩放,默认以中心点缩放,而不影响其他盒子
        </h3>
    </body>
</html>
css3动画 复写
<!DOCTYPE html>
<html>
    <head>
        <meta charset="utf-8">
        <title></title>
        <style type="text/css">
            img{
                width: 100px;
                height: 100px;
                transition: all 0.4s ease;
            }
            img:hover{
                transform: translate(50px,50px) rotate(100deg) scale(1.5);
            }
        </style>
    </head>
    <body>
        <img src="bomb.png" >
        <h3>
            1. 在使用 transform 的时候可以进行复写,一些使用多个动画效果 <br>
            2. 当一起使用的效果有 位移translate 的时候,需要把 translate 写到最前面
        </h3>
    </body>
</html>
css3高级动画 常用属性
<!DOCTYPE html>
<html>
    <head>
        <meta charset="utf-8">
        <title></title>
        <style type="text/css">
            /* 1. 定义动画 */
            @keyframes my_img_1{
                0% {  /* 开始状态 */
                    transform: translateX(0px);
                }
                50% {  /* 中间状态 */
                    transform: translateX(300px);
                }
                100% {  /* 结束状态 */
                    transform: translateX(0px);
                }
            }
            @keyframes my_img_2{
                from{  /* 开始状态 */
                    transform: translateX(0px);
                }
                50% {  /* 中间状态 */
                    transform: translateX(300px);
                }
                to{  /* 结束状态 */
                    transform: translateX(100px);
                }
            }
            /* 2. 使用动画 */
            .img_1 {
                animation-name: my_img_2;  /* 动画名称 */
                animation-duration: 2s;  /* 持续时间 */

                animation-iteration-count: infinite;  /* 执行次数 */
                animation-direction: alternate;  /* 设置反向播放 */
            }
            .img_1:hover {
                animation-play-state: paused;  /* 是否停止动画这里鼠标放上去让暂停动画 */
            }

            .img_2{
                animation-name: my_img_2;  /* 动画名称 */
                animation-duration: 2s;  /* 持续时间 */
                animation-fill-mode: forwards;  /* 是否回到起始状态 */
                animation: ;
            }


        </style>
    </head>
    <body>
        <img src="bomb.png"  class="img_1"> <br>
        <img src="bomb.png"  class="img_2">
        <h3>
            1. @keyframes用来声明一些动画的关键帧,form 和 to 类似于 0% 100% <br>
            2. 百分比就是时间的划分 25% 就代表 总时间的25%的时间的状态 <br>
            3. animation-name 用来指定盒子所使用的的关键帧 <br>
            4. animation-duration 设置动画从0%到100%执行的总时间 <br>
            5. animation-iteration-count 来设置动画的执行次数 <br>
            6. animation-direction 设置是否反向播放,默认是 normal <br>
            7. animation-fill-mode 设置动画结束后是否回到初始状态,默认是backwards回到起始状态,forwards停留在结束状态 <br>
            8. animation-play-state 设置动画的暂停与继续
        </h3>
    </body>
</html>
css3高机动画 简写
<!DOCTYPE html>
<html>
    <head>
        <meta charset="utf-8">
        <title></title>
        <style type="text/css">

            @keyframes my_img_1{
                0% {  /* 开始状态 */
                    transform: translateX(0px);
                }
                50% {  /* 中间状态 */
                    transform: translateX(300px);
                }
                100% {  /* 结束状态 */
                    transform: translateX(110px);
                }
            }

            img {
                width: 100px;
                height: 100px;
                animation: my_img_1 2s linear 0s 1 alternate forwards;
                /* animation: 动画名字 持续时间 动画效果 从何时开始 执行次数 是否回放 是否停留最后状态 */
            }
        </style>
    </head>
    <body>
        <img src="bomb.png" >
        <h3>
            1. 当简写的时候 不能包括 animation-play-state 这个需要分离出来单独写 <br>
            2. animation: 动画名字 持续时间 动画效果 从何时开始 执行次数 是否回放 是否停留最后状态
        </h3>
    </body>
</html>
css3 高级动画 步长 steps
<!DOCTYPE html>
<html>
    <head>
        <meta charset="utf-8">
        <title></title>
        <style type="text/css">
            div{
                width: 0;
                height: 31px;
                background: pink;
                font-size: 30px;
                line-height: 30px;
                vertical-align: bottom;
                overflow: hidden;

                animation: d 0.8s steps(6) forwards ;
            }

            @keyframes d{
                0% {

                }
                100% {
                    width: 180px;
                }
            }
        </style>
    </head>
    <body>
        <div>
            我在这里等你
        </div>

        <h3>
            1. steps 用来设置动画的 <span style="color: red;">步长</span> 效果,设置了steps 就不需要设置ease/linear了
        </h3>
    </body>
</html>
css3高级动画步长 steps 案例


<!DOCTYPE html>
<html>
    <head>
        <meta charset="utf-8">
        <title></title>
        <style type="text/css">
            body {
                background-color: #ccc;
            }

            div {
                position: absolute;
                width: 200px;
                height: 100px;
                background: url(media/bear.png) no-repeat;
                animation: bear 1s steps(8) infinite, move 2s forwards linear;
            }

            @keyframes bear {
                0% {
                    background-position: 0 0;
                }

                100% {
                    background-position: -1600px 0;
                }
            }

            @keyframes move {

                /* 这个实现了小熊从左边跑到中间的效果 */
                0% {
                    left: 0;
                    top: 0;
                }

                100% {
                    left: 50%;
                    transform: translateX(-50%);
                }
            }
        </style>
    </head>
    <body>

        <div>
        </div>

        <h3>
            1. 一个元素可以同时使用多个动画,中间使用逗号分隔
        </h3>
    </body>
</html>